
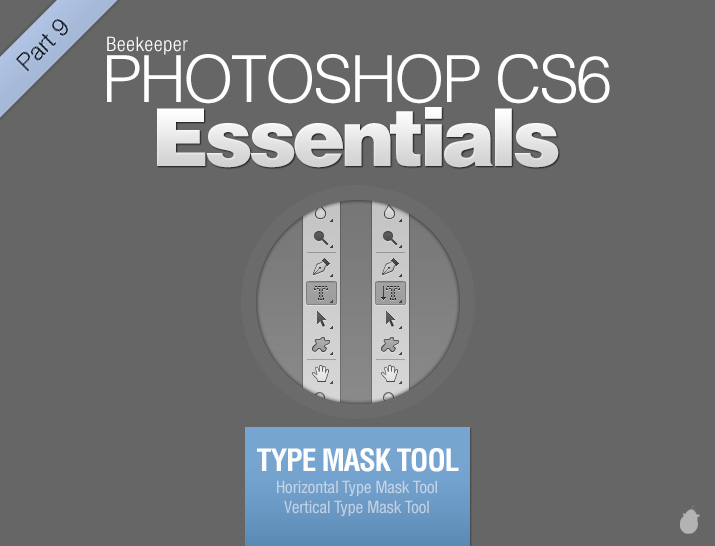
The remaining two type tools are 'Horizontal Type Mask Tool' and 'Vertical Type Mask Tool'. There is no big difference between these two, so we will cover both.
For the sake of consistency, iam going to use Horizontal type mask tool. The same applies to Vertical Type Mask Tool.
 Essentials Index
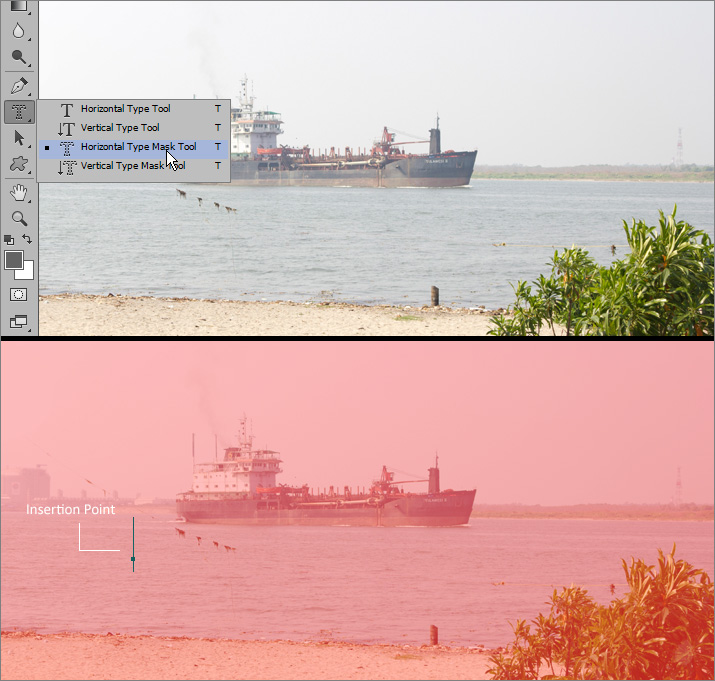
The mask tools are below the 'Vertical type tool' from the toolbar. Select the Horizontal Type Mask Tool.
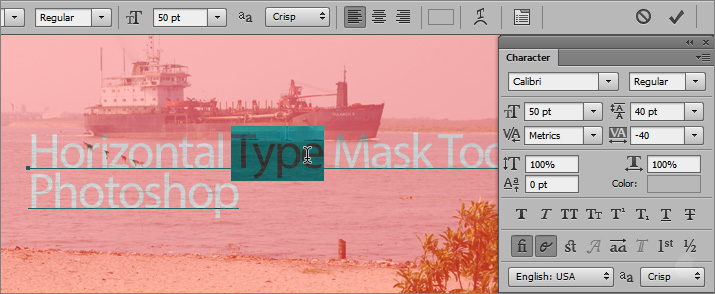
Click on the image will place an insertion point (fig 1.0 - 2). The red overlay is a Quick mask mode. Quick mask mode helps you to edit the selections, after you exit from the quick mask mode the text will display as selection border.
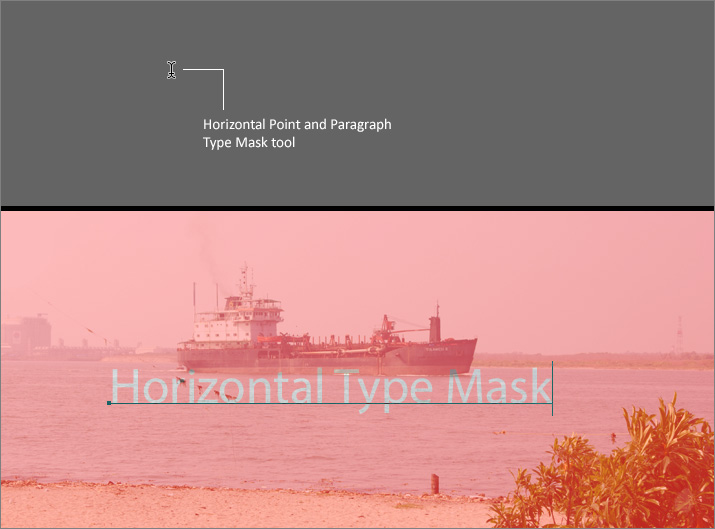
Vertical I-beam cursor for Point type and Paragraph type for Horizontal Type Mask Tool and Horizontal I-beam is for Vertical Type Mask Tool. (fig 1.1 - 1)
Because of the mask, the text will looks like a punched hole (fig 1.1 - 2)
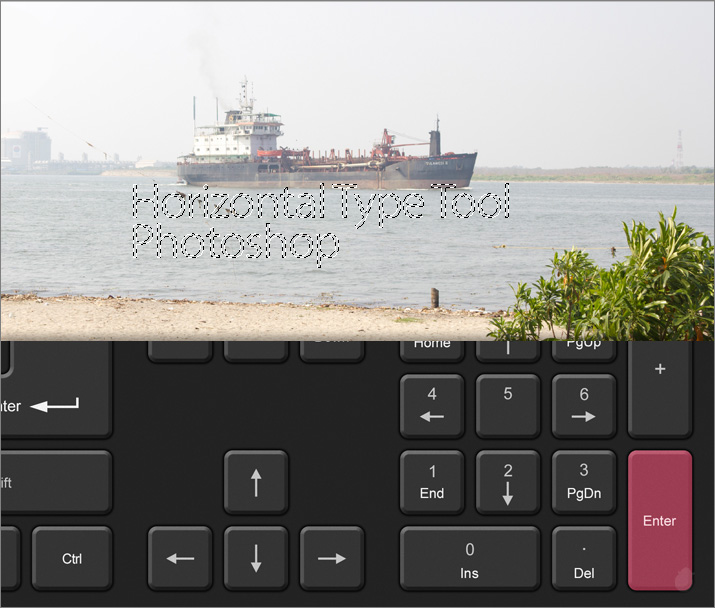
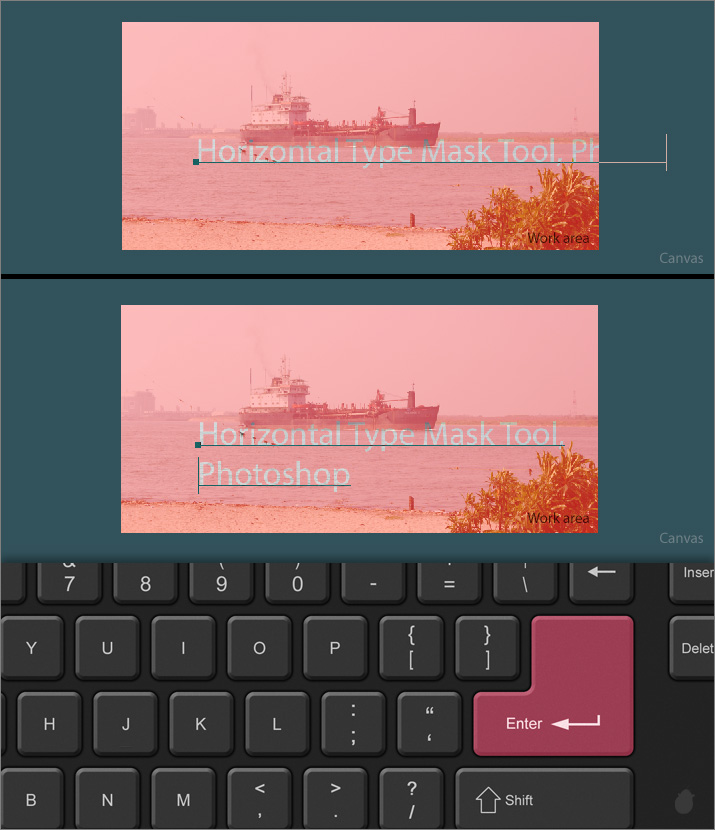
Just like Original Horizontal Point type, the longer text will go outside the work area into the canvas. You can use Enter (Windows) Return (Mac OS) to break the line.
The only way to edit the type is in the quick mask mode. you can adjust the font family, size, leading, caps, italic and almost everything except color. Notice the color box in the character panel and also in the options bar is in grey color, it does not work even if you double-click.
You can also move the text around, just like how you move the point type. Moving the cursor away from the text will display move control. Remember everything we are working in the Quick mask mode.
Once you have adjusted the text, press the 'Commit text' button in the options bar (fig 3.0) or you can press the Enter (Windows) from the keypad (fig 4.0) or Command + Enter (Mac OS) from the keyboard.
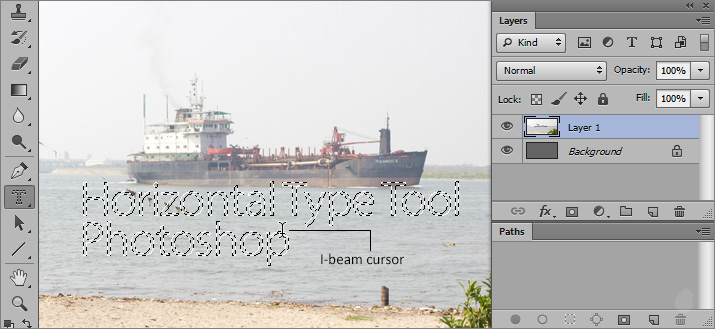
Even if you bring the Horizontal Type Mask Tool over the selection area, it will only display the original cursor. Notice there is no 'Text Layer' created in the layers panel and no 'Type path' in paths panel.
Because there is no Type layer, editing is not available after you commit the text.
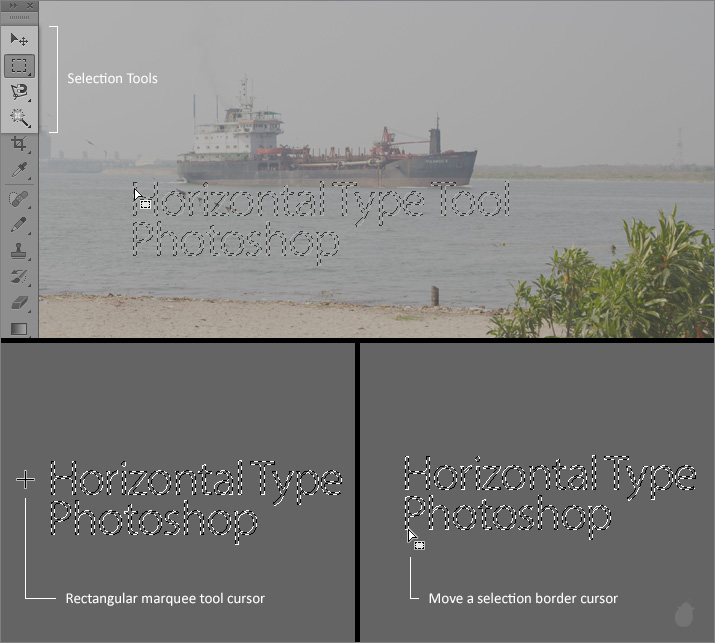
Since it's a selection, you can use any of the selection tools like Rectangular marquee tool, Elliptical marquee tool, Single row marquee tool, Single column marquee tool, Lasso tool, Polygonal lasso tool, Magnetic lasso tool and Magic wand tool. Quick selection tool does not work.
When you select any of the Marquee tools, make sure you select 'New Selection' from the options bar.
You can notice the image below (fig 5.0 - 2) i have selected the Rectangular marquee tool and if the cursor is outside the selection it will display the current tool and if i bring the cursor inside it will toggle to 'Move a selection border' cursor.
The move tool works only if you have any image below, else you will get an alert message. But remember when you move the selection it will cut the image below along with it (fig 6.0 - 2).
The move tool 'Moves a selection', hence a scissor with arrow as a cursor.
Remember, 'Move a selection border' will move only the border (running ants) and does not affect any layer below, 'Move a selection' will affect the picture below the selection, and it cuts everything inside the selection as you drag.

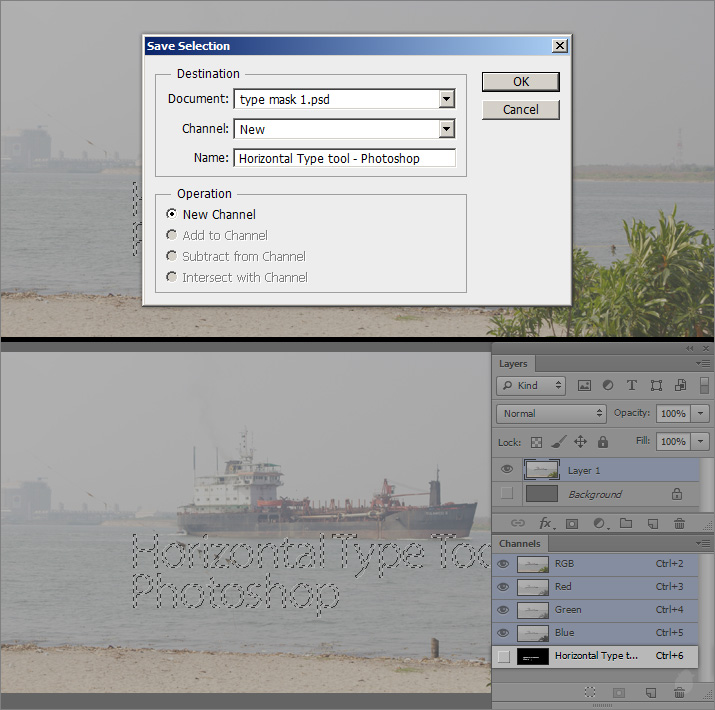
To fill the selection you can create a new layer and apply color or you can also save the selection for later use. Go to 'Select' from the Menu Bar and select 'Save Selection..'
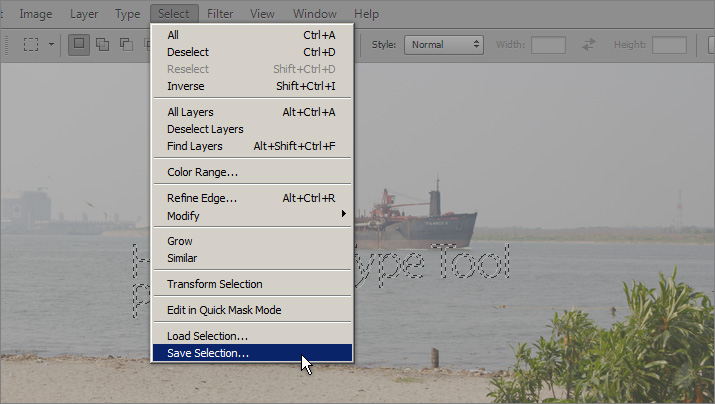
This will brings up a Save Selection dialog box. Enter the name you want in the 'Name' field and press 'OK' (fig 7.1 - 1).
A new channel is created in the channels panel (fig 7.1 - 2).
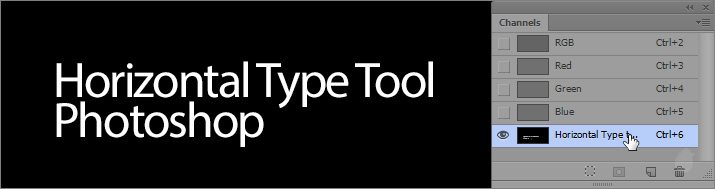
You can select the newly created channel name to display the text. To bring the selection back, click the first icon at the bottom of the channels panel, 'Load channel as selection'.
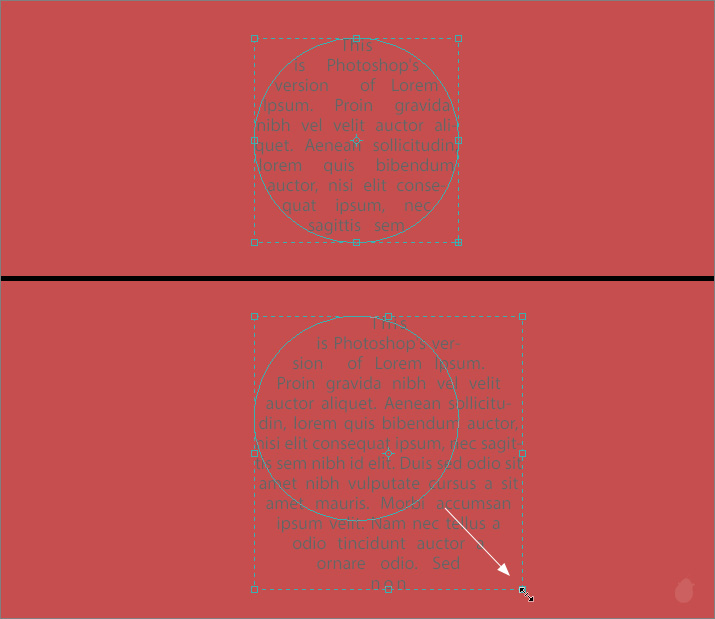
With the same cursor, click and drag will creates a paragraph bounding box (fig 9.0 - 1). This works exactly like the paragraph bounding box, you can even see the overflow icon at the bottom right (fig 9.0 - 1).

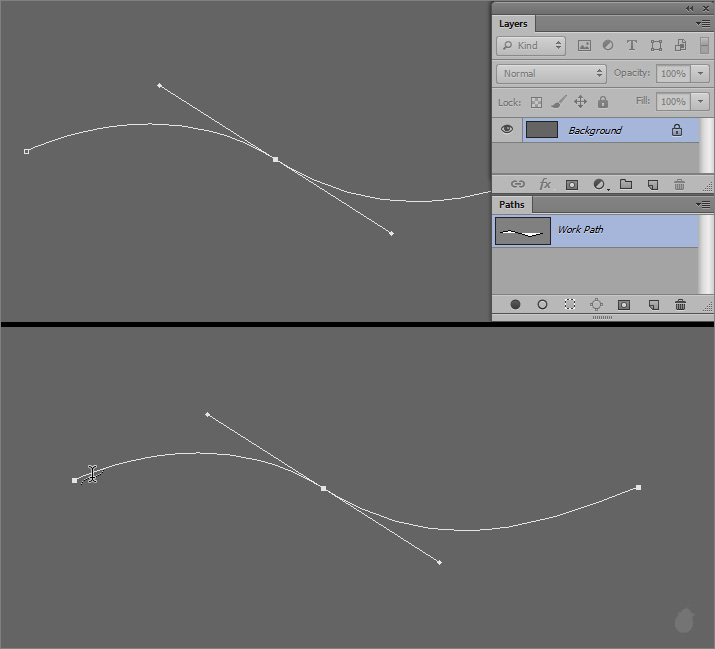
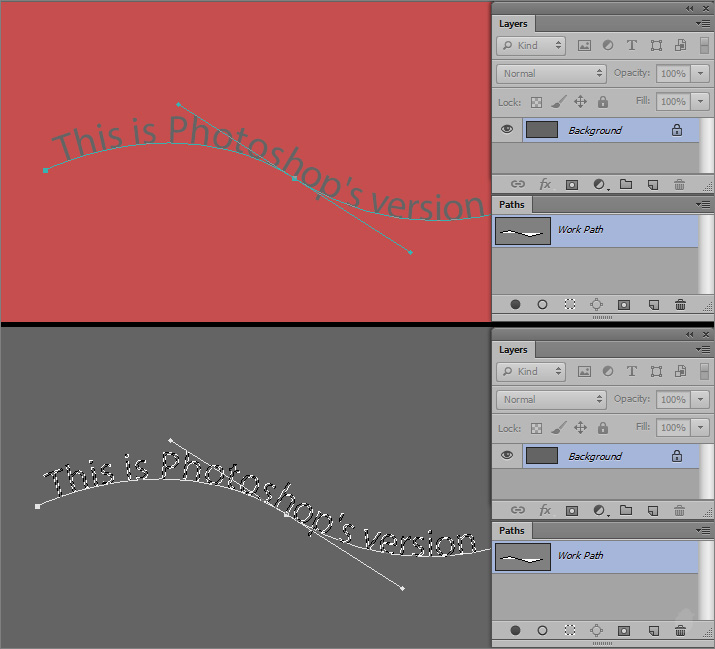
Let's see how Horizontal mask type work on a path. Here (fig 10.0) i have created this path with pen tool, a Work Path layer creates automatically in the paths panel.
The cursor changes to 'Type on path' as i mouse-over.
Even after adding the text, there is no 'Type path' or Type layer creates in any of the panels (fig 10.0 - 1). Also nothing if i commit the text (fig 10.0 - 2).
The work path is still there with handles untouched.
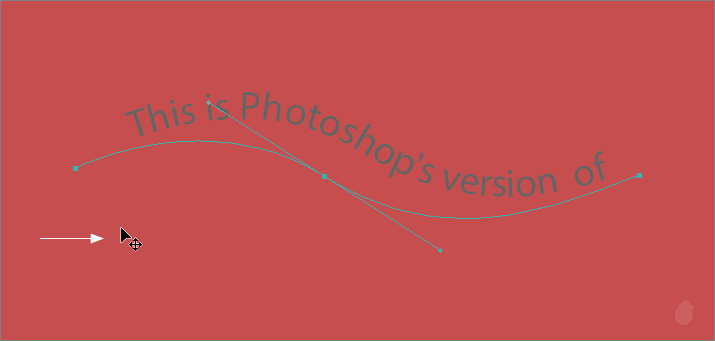
If i move the text in quick mask mode, notice the path does not follow the text. The text takes the path as a reference to create the flow, but it does not create a baseline from it.
Since it does not have its own baseline, even the I-beam with an arrow is not available.
Horizontal/Vertical Type Mask tool inside the path almost works the same. Mouse-over inside the path will display the original 'Type inside the path' cursor.
The text automatically wraps inside the path with an overflow icon in the bounding box. Notice there is no overflow icon in the path outline.
Once i commit, all the remaining texts get deleted without any alert message. Since it's a Work Path there is no overflow icon.
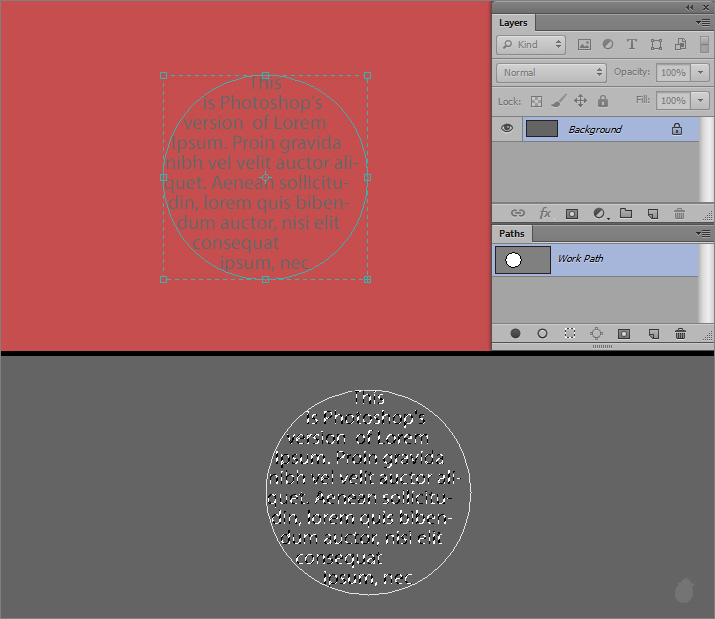
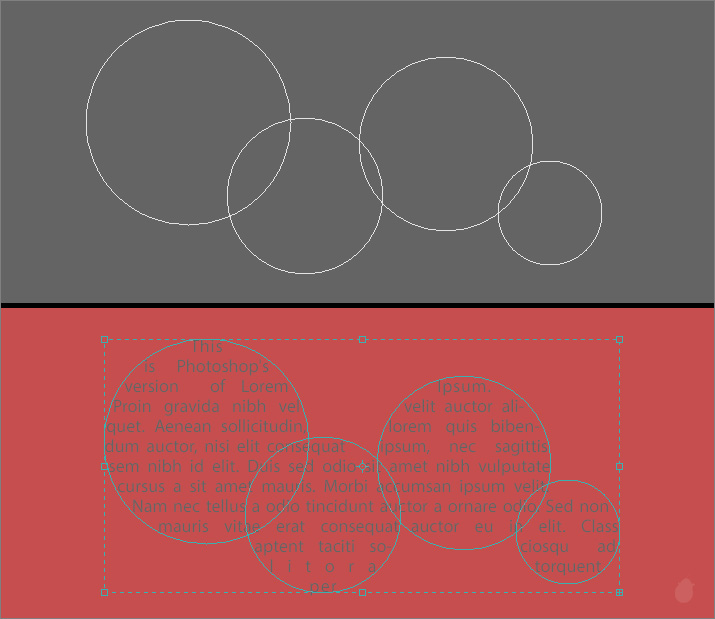
If i make the bounding box bigger, the remaining text will automatically flows in.
Notice the extended box maintains the same sphere shape.
Even though it does not creates any Type path or baseline, it still reads multiple overlapping closed paths. Notice how the text flows in all the shapes.
That wraps up all the Type tools from the toolbar here inside Photoshop. Before we check into the Type tools options bar, lets take a sneak peek of the things that we can do with the text, apart from creating and editing.
Next Essential >> Essential for Type Tool 10
For the sake of consistency, iam going to use Horizontal type mask tool. The same applies to Vertical Type Mask Tool.
The mask tools are below the 'Vertical type tool' from the toolbar. Select the Horizontal Type Mask Tool.
Click on the image will place an insertion point (fig 1.0 - 2). The red overlay is a Quick mask mode. Quick mask mode helps you to edit the selections, after you exit from the quick mask mode the text will display as selection border.
(fig 1.0)
Vertical I-beam cursor for Point type and Paragraph type for Horizontal Type Mask Tool and Horizontal I-beam is for Vertical Type Mask Tool. (fig 1.1 - 1)
Because of the mask, the text will looks like a punched hole (fig 1.1 - 2)
(fig 1.1)
Just like Original Horizontal Point type, the longer text will go outside the work area into the canvas. You can use Enter (Windows) Return (Mac OS) to break the line.
The only way to edit the type is in the quick mask mode. you can adjust the font family, size, leading, caps, italic and almost everything except color. Notice the color box in the character panel and also in the options bar is in grey color, it does not work even if you double-click.
You can also move the text around, just like how you move the point type. Moving the cursor away from the text will display move control. Remember everything we are working in the Quick mask mode.
(fig 3.0)
Once you have adjusted the text, press the 'Commit text' button in the options bar (fig 3.0) or you can press the Enter (Windows) from the keypad (fig 4.0) or Command + Enter (Mac OS) from the keyboard.
(fig 4.0)
Even if you bring the Horizontal Type Mask Tool over the selection area, it will only display the original cursor. Notice there is no 'Text Layer' created in the layers panel and no 'Type path' in paths panel.
Because there is no Type layer, editing is not available after you commit the text.
(fig 4.1)
Since it's a selection, you can use any of the selection tools like Rectangular marquee tool, Elliptical marquee tool, Single row marquee tool, Single column marquee tool, Lasso tool, Polygonal lasso tool, Magnetic lasso tool and Magic wand tool. Quick selection tool does not work.
When you select any of the Marquee tools, make sure you select 'New Selection' from the options bar.
You can notice the image below (fig 5.0 - 2) i have selected the Rectangular marquee tool and if the cursor is outside the selection it will display the current tool and if i bring the cursor inside it will toggle to 'Move a selection border' cursor.
(fig 5.0)
The move tool works only if you have any image below, else you will get an alert message. But remember when you move the selection it will cut the image below along with it (fig 6.0 - 2).
The move tool 'Moves a selection', hence a scissor with arrow as a cursor.
Remember, 'Move a selection border' will move only the border (running ants) and does not affect any layer below, 'Move a selection' will affect the picture below the selection, and it cuts everything inside the selection as you drag.
(fig 6.0)
To fill the selection you can create a new layer and apply color or you can also save the selection for later use. Go to 'Select' from the Menu Bar and select 'Save Selection..'
(fig 7.0)
This will brings up a Save Selection dialog box. Enter the name you want in the 'Name' field and press 'OK' (fig 7.1 - 1).
A new channel is created in the channels panel (fig 7.1 - 2).
(fig 7.1)
You can select the newly created channel name to display the text. To bring the selection back, click the first icon at the bottom of the channels panel, 'Load channel as selection'.
(fig 8.0)
With the same cursor, click and drag will creates a paragraph bounding box (fig 9.0 - 1). This works exactly like the paragraph bounding box, you can even see the overflow icon at the bottom right (fig 9.0 - 1).
(fig 9.0)
Let's see how Horizontal mask type work on a path. Here (fig 10.0) i have created this path with pen tool, a Work Path layer creates automatically in the paths panel.
The cursor changes to 'Type on path' as i mouse-over.
(fig 10.0)
Even after adding the text, there is no 'Type path' or Type layer creates in any of the panels (fig 10.0 - 1). Also nothing if i commit the text (fig 10.0 - 2).
The work path is still there with handles untouched.
(fig 10.1)
If i move the text in quick mask mode, notice the path does not follow the text. The text takes the path as a reference to create the flow, but it does not create a baseline from it.
Since it does not have its own baseline, even the I-beam with an arrow is not available.
(fig 10.2)
Horizontal/Vertical Type Mask tool inside the path almost works the same. Mouse-over inside the path will display the original 'Type inside the path' cursor.
(fig 11.0)
The text automatically wraps inside the path with an overflow icon in the bounding box. Notice there is no overflow icon in the path outline.
Once i commit, all the remaining texts get deleted without any alert message. Since it's a Work Path there is no overflow icon.
(fig 11.1)
If i make the bounding box bigger, the remaining text will automatically flows in.
Notice the extended box maintains the same sphere shape.
(fig 12.0)
Even though it does not creates any Type path or baseline, it still reads multiple overlapping closed paths. Notice how the text flows in all the shapes.
(fig 13.0)
That wraps up all the Type tools from the toolbar here inside Photoshop. Before we check into the Type tools options bar, lets take a sneak peek of the things that we can do with the text, apart from creating and editing.
Next Essential >> Essential for Type Tool 10
No comments:
Post a Comment