

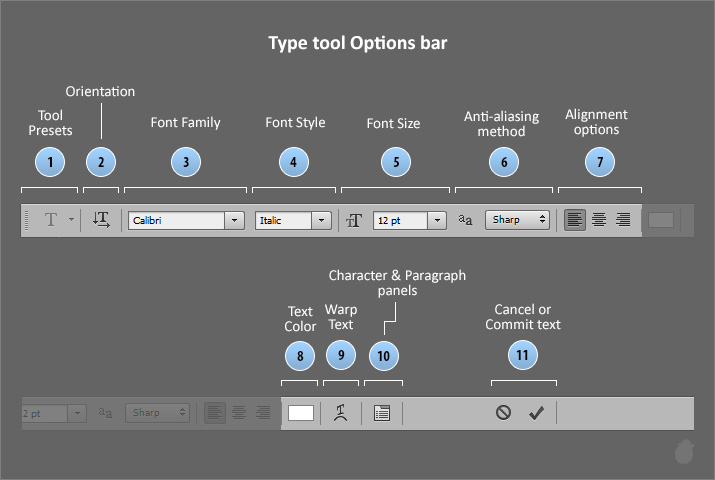
The first thing we do after we create any text is to change the font, size or color, which is easily accessible from the options bar.
We will look at one at a time and go through all the options.
Some of the options you can also access from the Characters panel, Paragraph panel, Type menu and Context menu from the work area and also from the Layers palette.
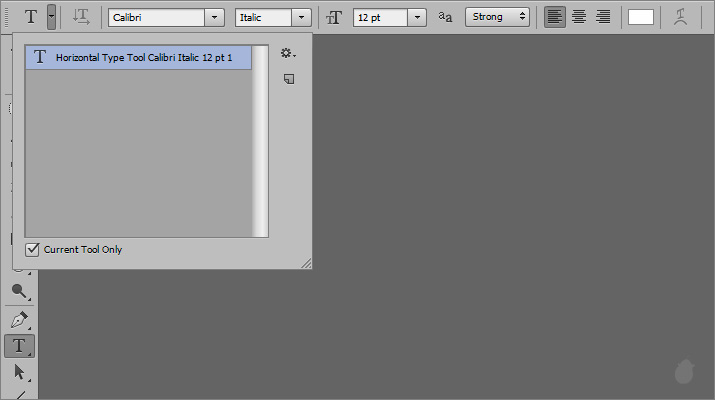
Tool preset will let you save the options and re-use it later. Click the 'T' icon to open the tool presets pop-up panel in the options bar. You can save, delete or even load the presets.
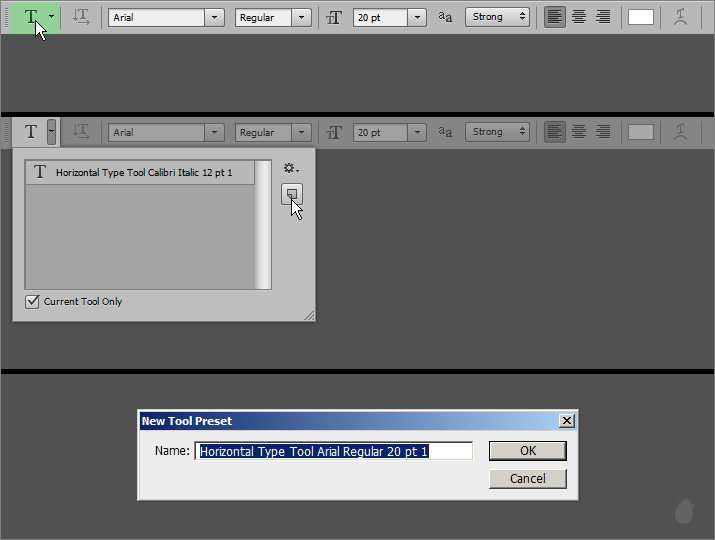
You can select anywhere near the T (the green box) (fig 3.0 - 1) to open the tool presets pop-up panel. Click the Create New Preset button (fig 3.0 - 2) to bring the New Tool Preset dialog box. Click OK to save the current settings as a preset (fig 3.0 - 3).
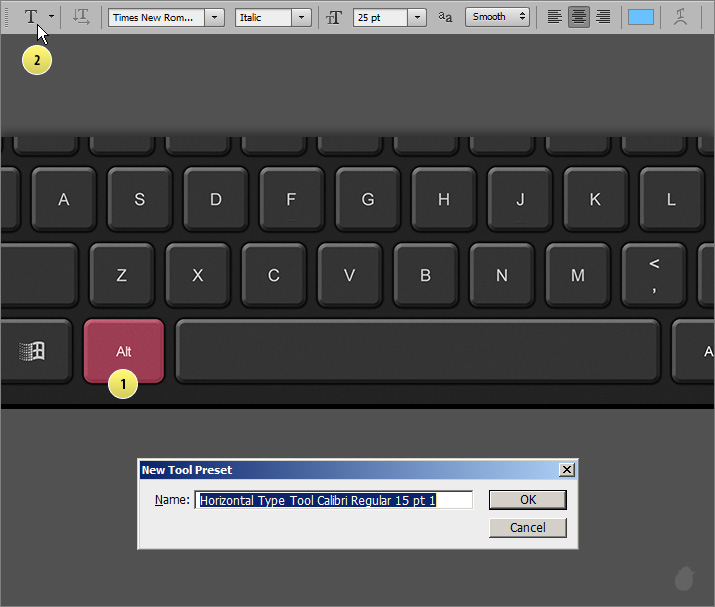
Hold the Alt (Win) Option (Mac OS) and click the 'T' in the options bar to bring the New Tool Preset dialog box without opening the tool presets popup panel.
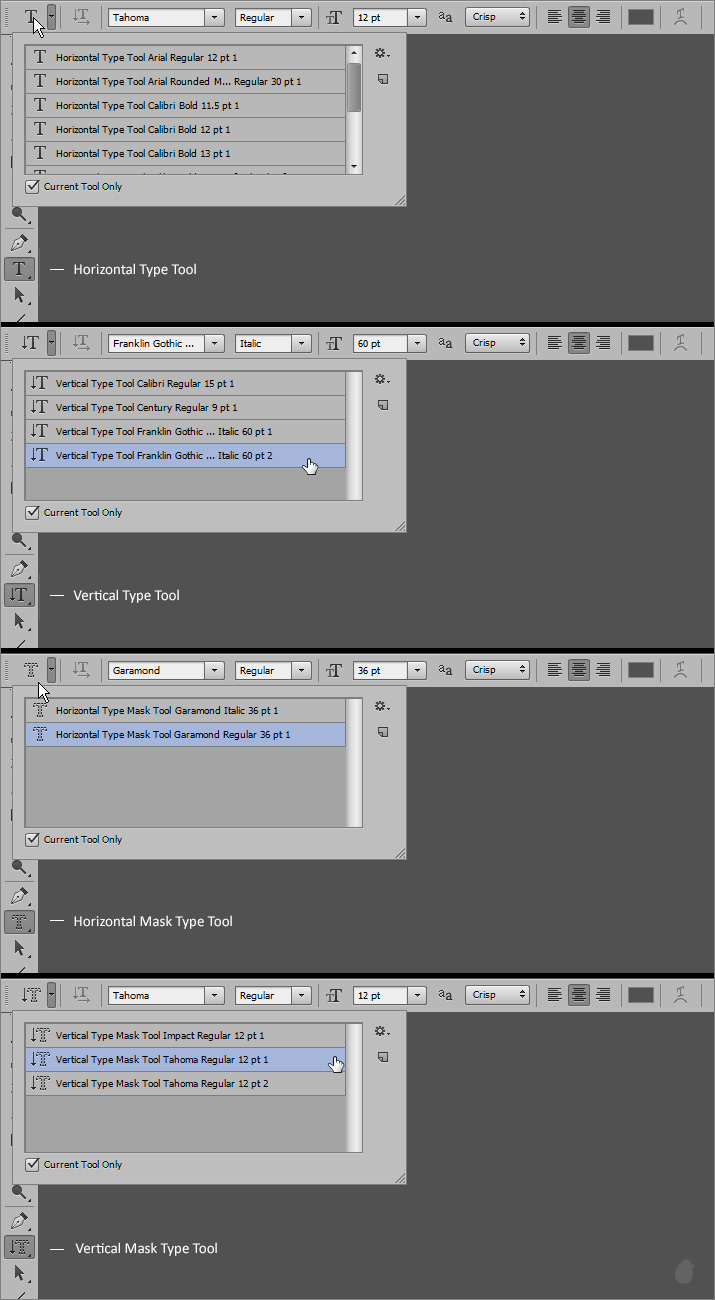
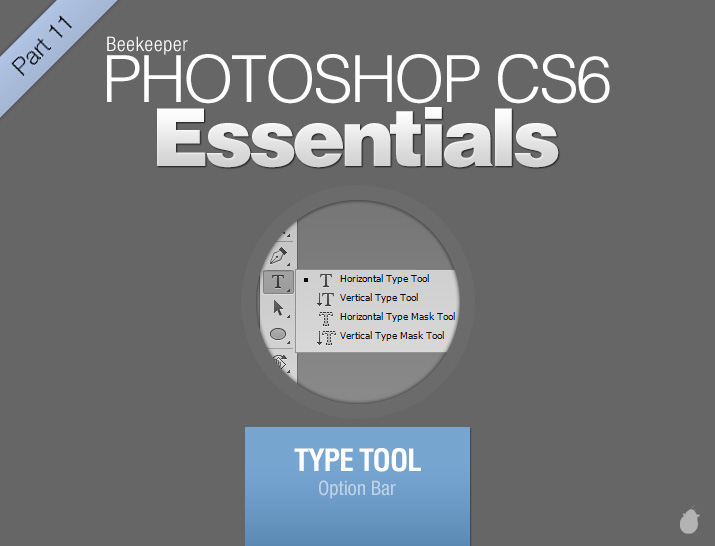
There are Four type tools in the toolbar, horizontal, vertical, horizontal mask and vertical mask and each tool has its own preset which are saved in its own Tool presets pop-up panel.
(You can also uncheck 'Current Tool Only' at the bottom of the tool presets pop-up panel to display all the tool presets.)
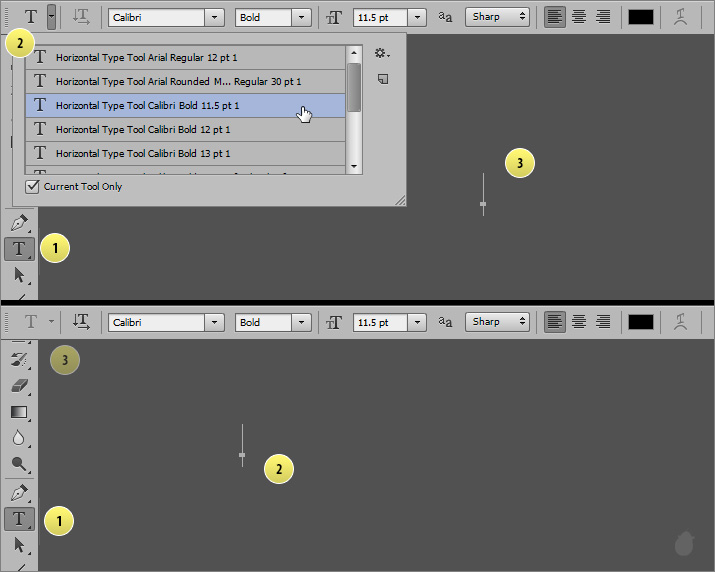
Tool preset is active only before creating the text.
(fig 6.0 - 1) Select one of the Type tool in the toolbox and select the preset from the tool presets pop-up panel, click to place the insertion point. Selecting the tool preset before placing the insertion point will change all the options according to the selected tool preset configuration.
You cannot select the tool preset ('T'), after placing the insertion point in the work area (fig 6.0 - 2).
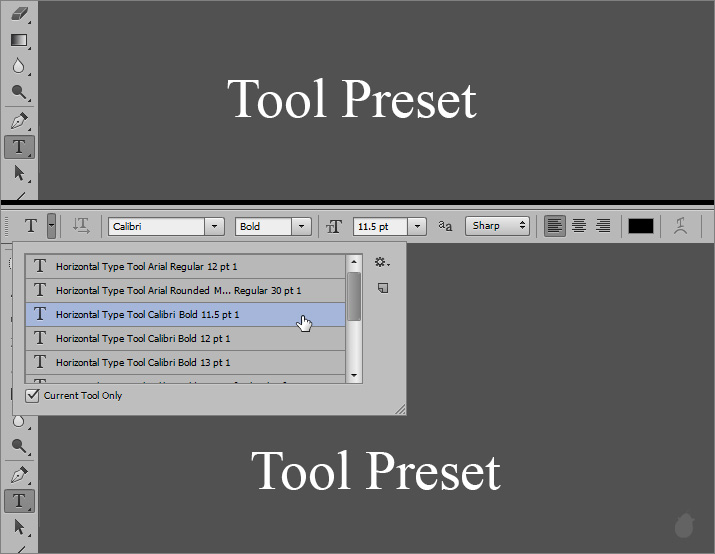
Tool preset does not work on a text which is already created. If you select any preset, it will take effect when next time you create any text.
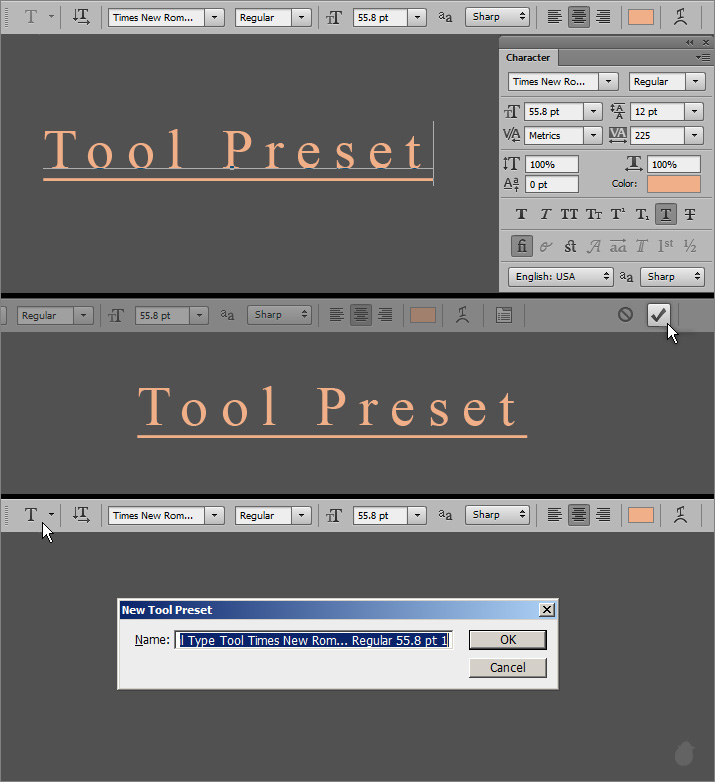
Sometime it's hard to create a preset by without looking at the text visually.
Create a text (it could be anything, doesn't matter) and edit the settings from the options bar and also from the character panel if necessary (fig 8.0 - 1). Once you are happy with the look and feel, click the Commit Text (fig 8.0 - 2). Now by creating a new tool preset will save all your current settings (fig 8.0 - 3).
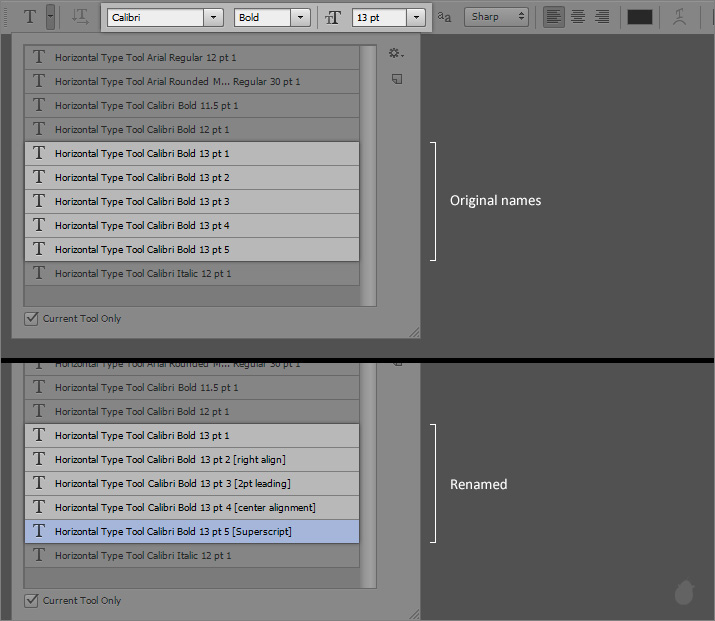
When you change settings other than font family, style and size, the sequence number will increase (fig 10.0 - 1). But if you change these three options, the sequence number will start again.
You can also rename them to see what changes you have made (fig 10.0 - 2).
Orientation button will toggle horizontal to vertical or vertical to horizontal text. This option toggles only the text and not the type tool in the toolbar.
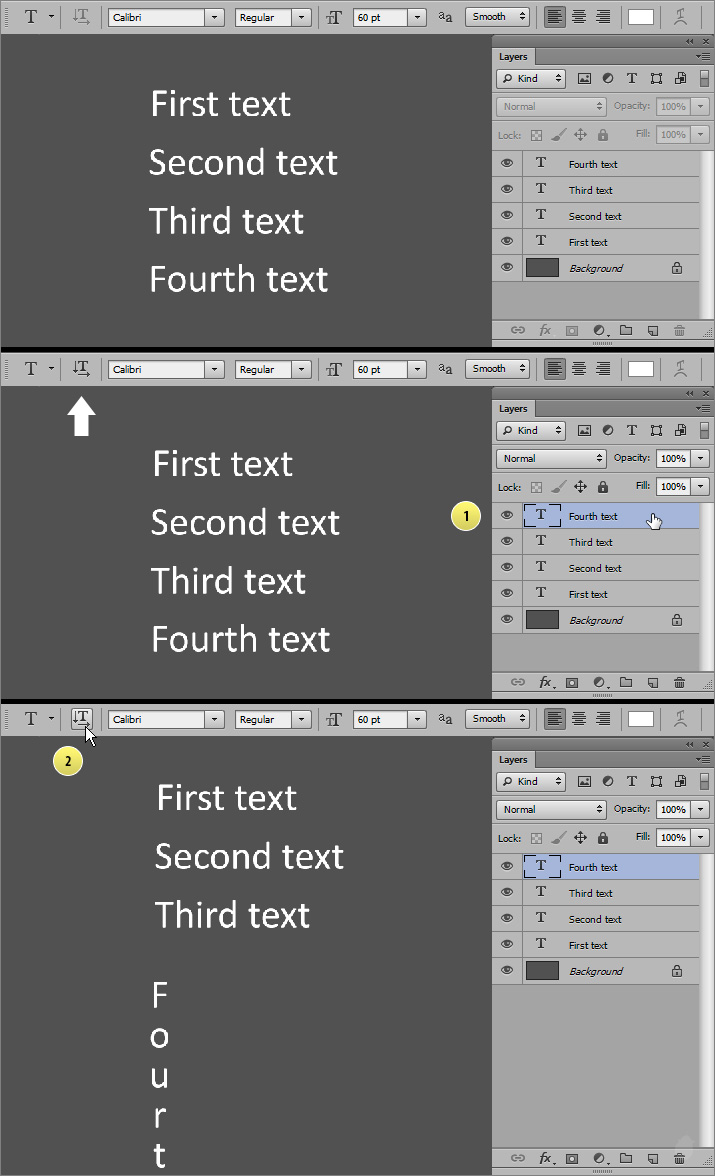
To make the Orientation toggle button active, place the insertion point anywhere in the work area.
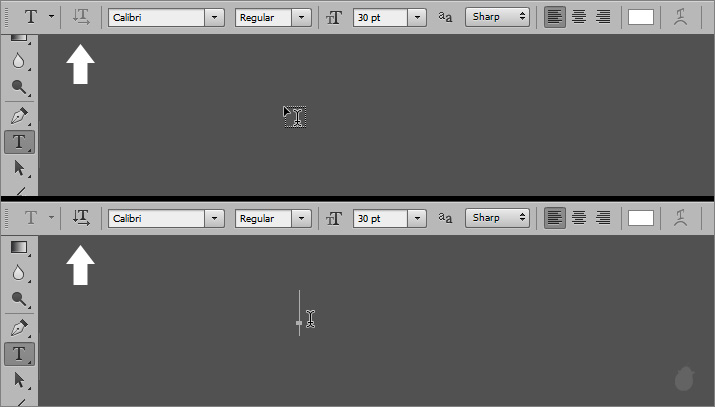
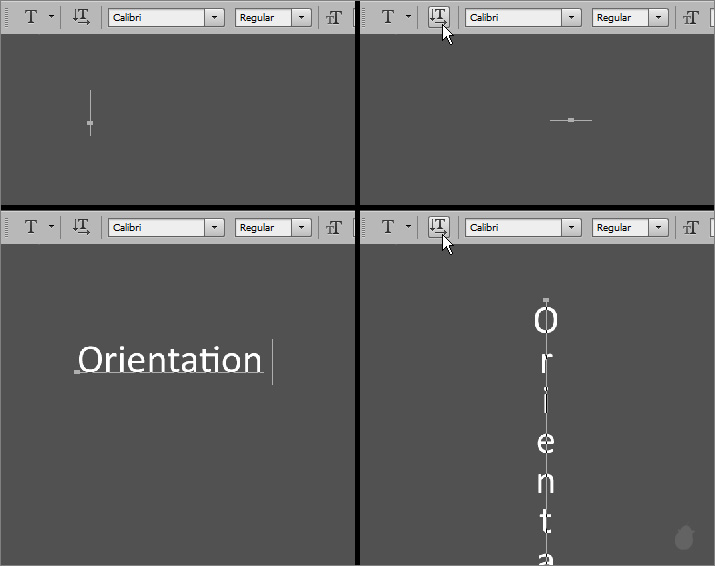
After placing the insertion point, you can change the orientation (fig 11.1 - 1) even without typing. The button in the options bar does not change or highlight, the changes can only be seen in the work area.
You can also toggle the orientations even after creating the text (fig 11.1 - 2) and still in the edit mode.
After creating the text and if there is no text layer is selected in the layers palette, the orientation toggle button in the options bar will not be active (fig 12.0 - 1).
To make it active, select one of the text layer (fig 12.0 - 2) and press the toggle button (fig 12.0 - 3). The changes affect only to the selected text layer.
You can use either left or right mouse-click to toggle the orientation button in the options bar.
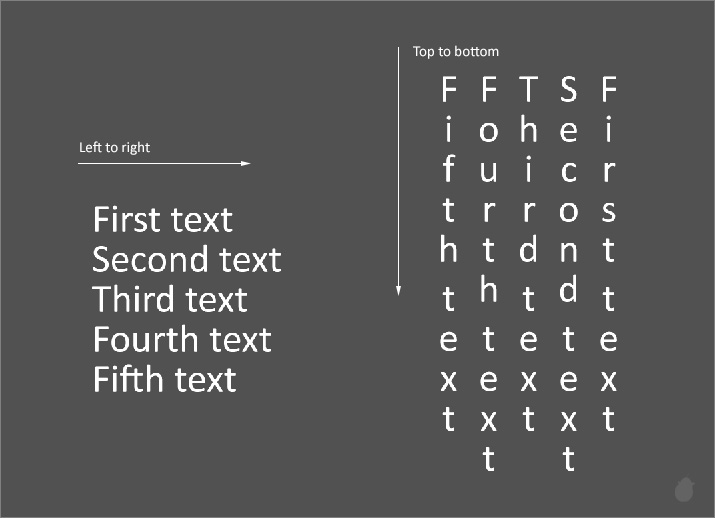
The text direction for Horizontal type is left to right and Vertical type is top to bottom. Orientation toggle button will switch among these two.
Next Essential >> Essential for Type Tool 12
We will look at one at a time and go through all the options.
Some of the options you can also access from the Characters panel, Paragraph panel, Type menu and Context menu from the work area and also from the Layers palette.
(fig 1.0)
| Tool Presets |
Tool preset will let you save the options and re-use it later. Click the 'T' icon to open the tool presets pop-up panel in the options bar. You can save, delete or even load the presets.
(fig 2.0)
You can select anywhere near the T (the green box) (fig 3.0 - 1) to open the tool presets pop-up panel. Click the Create New Preset button (fig 3.0 - 2) to bring the New Tool Preset dialog box. Click OK to save the current settings as a preset (fig 3.0 - 3).
(fig 3.0)
Hold the Alt (Win) Option (Mac OS) and click the 'T' in the options bar to bring the New Tool Preset dialog box without opening the tool presets popup panel.
(fig 4.0)
There are Four type tools in the toolbar, horizontal, vertical, horizontal mask and vertical mask and each tool has its own preset which are saved in its own Tool presets pop-up panel.
(You can also uncheck 'Current Tool Only' at the bottom of the tool presets pop-up panel to display all the tool presets.)
(fig 5.0)
Tool preset is active only before creating the text.
(fig 6.0 - 1) Select one of the Type tool in the toolbox and select the preset from the tool presets pop-up panel, click to place the insertion point. Selecting the tool preset before placing the insertion point will change all the options according to the selected tool preset configuration.
You cannot select the tool preset ('T'), after placing the insertion point in the work area (fig 6.0 - 2).
(fig 6.0)
Tool preset does not work on a text which is already created. If you select any preset, it will take effect when next time you create any text.
(fig 7.0)
Sometime it's hard to create a preset by without looking at the text visually.
Create a text (it could be anything, doesn't matter) and edit the settings from the options bar and also from the character panel if necessary (fig 8.0 - 1). Once you are happy with the look and feel, click the Commit Text (fig 8.0 - 2). Now by creating a new tool preset will save all your current settings (fig 8.0 - 3).
(fig 8.0)
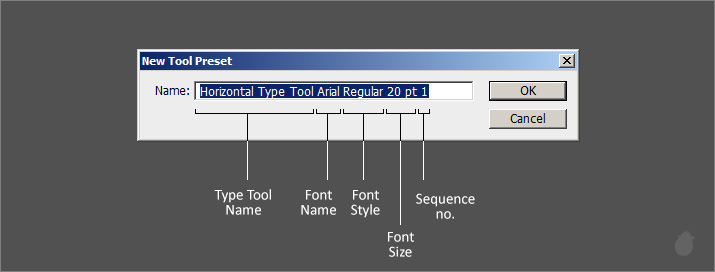
| New Tool Preset Dialog box | |
|---|---|
| Horizontal Type Tool | currently selected type tool |
| Arial | font family |
| Regular | font style |
| 20 pt | font size |
| 1 | sequence number |
(fig 9.0)
When you change settings other than font family, style and size, the sequence number will increase (fig 10.0 - 1). But if you change these three options, the sequence number will start again.
You can also rename them to see what changes you have made (fig 10.0 - 2).
(fig 10.0)
 |
Orientation |
Orientation button will toggle horizontal to vertical or vertical to horizontal text. This option toggles only the text and not the type tool in the toolbar.
To make the Orientation toggle button active, place the insertion point anywhere in the work area.
(fig 11.0)
After placing the insertion point, you can change the orientation (fig 11.1 - 1) even without typing. The button in the options bar does not change or highlight, the changes can only be seen in the work area.
You can also toggle the orientations even after creating the text (fig 11.1 - 2) and still in the edit mode.
(fig 11.1)
After creating the text and if there is no text layer is selected in the layers palette, the orientation toggle button in the options bar will not be active (fig 12.0 - 1).
To make it active, select one of the text layer (fig 12.0 - 2) and press the toggle button (fig 12.0 - 3). The changes affect only to the selected text layer.
(fig 12.0)
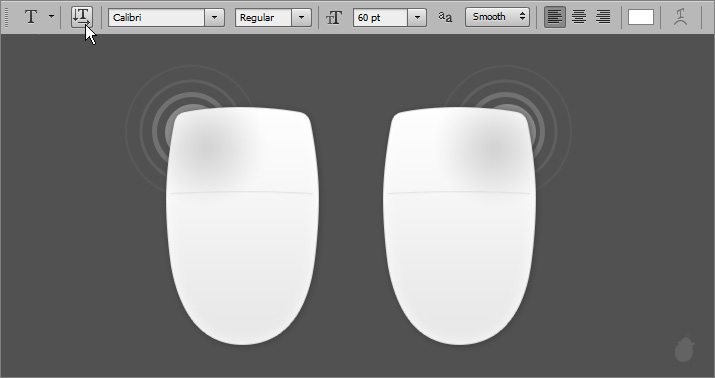
You can use either left or right mouse-click to toggle the orientation button in the options bar.
(fig 13.0)
The text direction for Horizontal type is left to right and Vertical type is top to bottom. Orientation toggle button will switch among these two.
(fig 14.0)
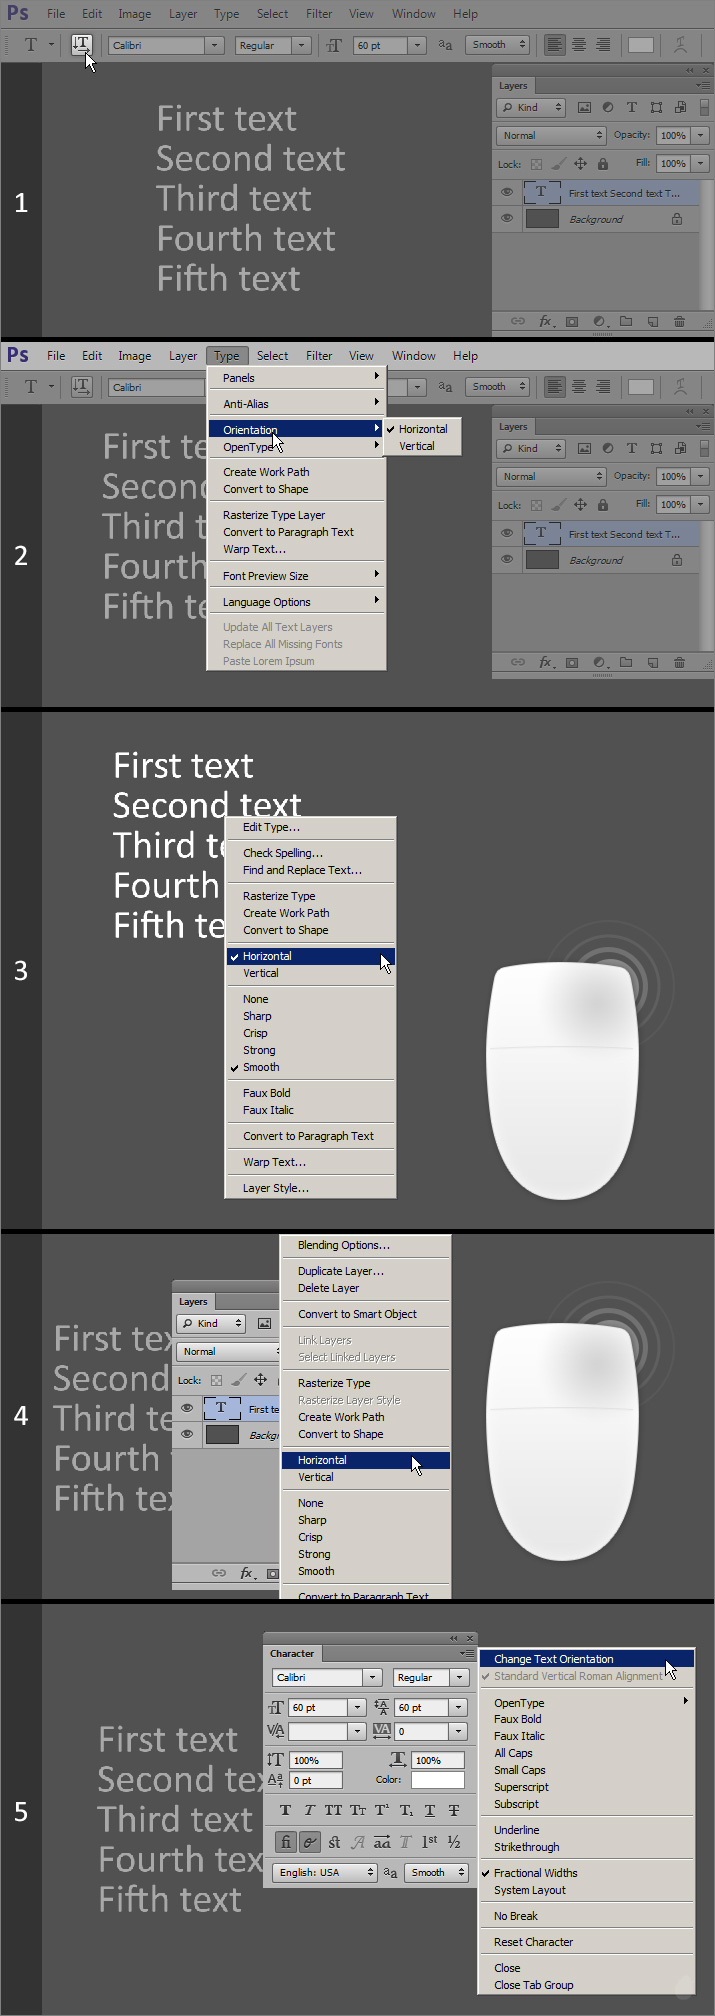
There are five ways you can toggle the Orientation for the text. | Location | Point type | Paragraph type | Type on path | Type inside path | ||||
| Edit | Commit | Edit | Commit | Edit | Commit | Edit | Commit | |
| Options Bar | Yes | Yes | Yes | Yes | Yes | Yes | Yes | Yes |
| Type Menu | Yes | Yes | Yes | Yes | Yes | Yes | Yes | Yes |
| Context Menu (text content) | No | Yes | No | Yes | No | Yes | No | Yes |
| Context Menu (text layer) | No | Yes | No | Yes | No | Yes | No | Yes |
| Characters Panel Menu | Yes | Yes | Yes | Yes | Yes | Yes | Yes | Yes |
(fig 15.0)
Next Essential >> Essential for Type Tool 12
No comments:
Post a Comment