


|
|
|
|
|
01. What are the types of images when it comes to printing?
02. what is color separation?
03. What are the resolution for different printers?
04. Why i cannot get the same quality when i print the image from my computer to my desktop printer?
05. Do i need to convert my image if iam printing on my desktop printer?
06. How to preview my image before i send it to the printer?
07. I have two option in the file menu ‘Print’ and ‘Print One Copy’ which one i choose?
08. If i scale the image in the print dialogue box, will that affect my original opened image?
09. How do i freely move my image on the print dialogue box?
10. When i print my image it went outside my printed paper, how do i see all the image?
11. How my Type files such as vector data is printed?
12. What about the resolution for the vector data?
13. What is ‘Cancel’, ‘Done’ and ‘Print’?
01. What are the types of images when it comes to printing?
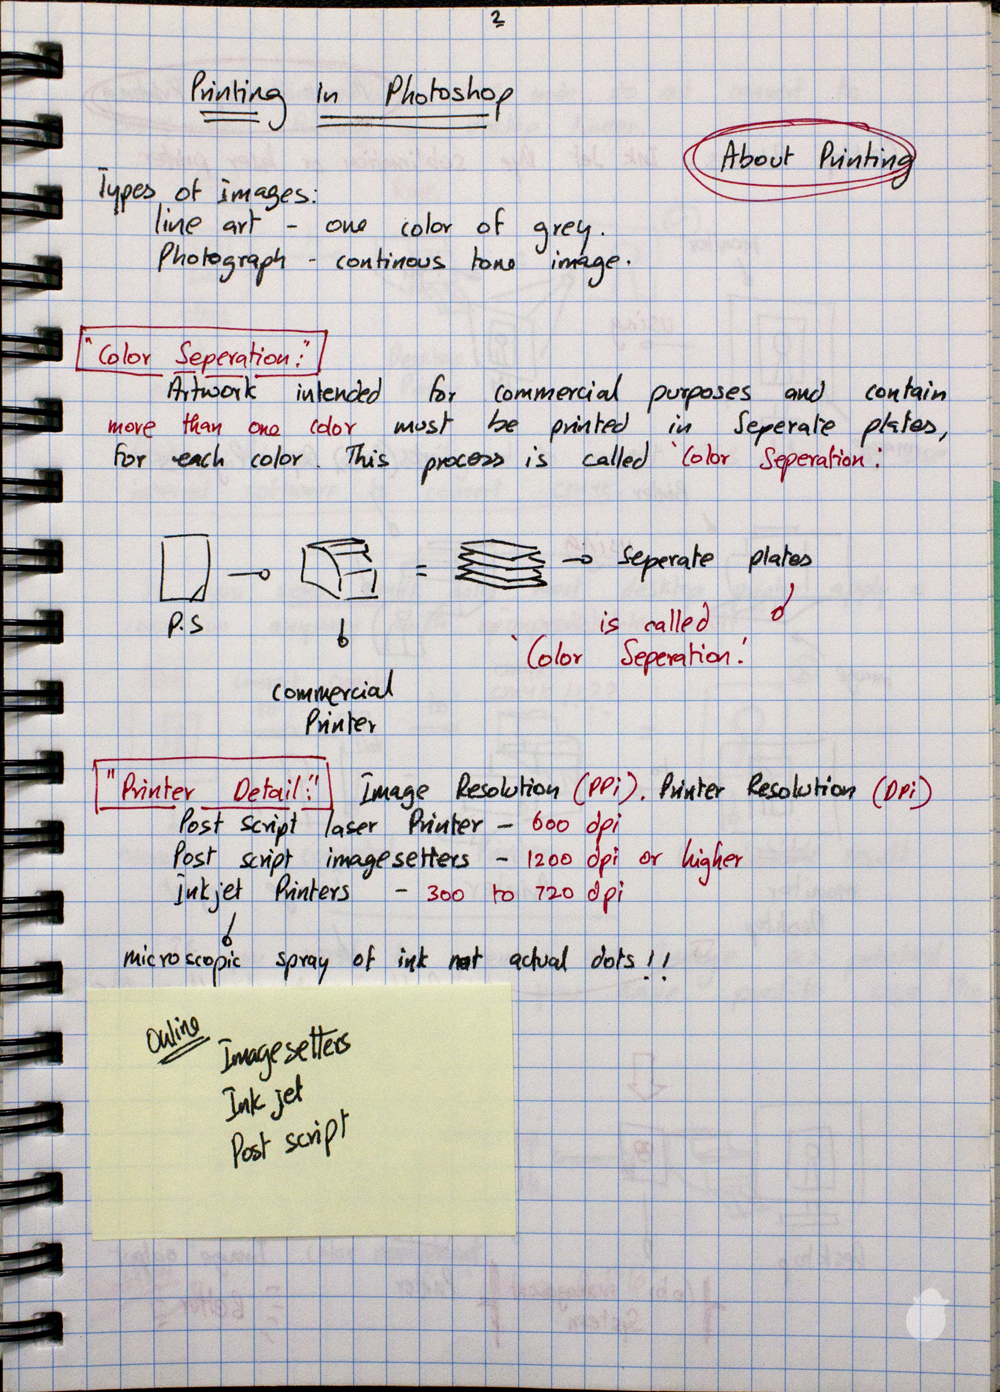
The two important types are lineart and photograph, lineart produces one color in one level of gray and more complex shades such as photograph has continous tones image.
02. what is color separation?
When the image/photographs goes out from photoshop or any graphic program to commercial printing purposes with continous tones of shades, the colors must be seperated and printed in a separate plates for each color.
03. What are the resolution for different printers?
Two kinds of resolution for your image, Image Resolution (PPI – pixel per inch) is what you see on your monitor and Print resolution (DPI – dots per inch) is for the printer.
Postscript laser printer has 600dpi and Postscript Imagesetter has 1200 dpi and highter
(Since, postscript is a page description language, they are independent, it can be used in laserprinter, screen or imgesetters with different kinds of resolution).
Inkjet printer has 300 to 720 dpi
(It produced microscopic spray of ink, which is extremely small dots, smaller than human hair. Because the dots are positioned very precisely and tiny it can able to create photo-quality image.)
04. Why i cannot get the same quality when i print the image from my computer to my desktop printer?
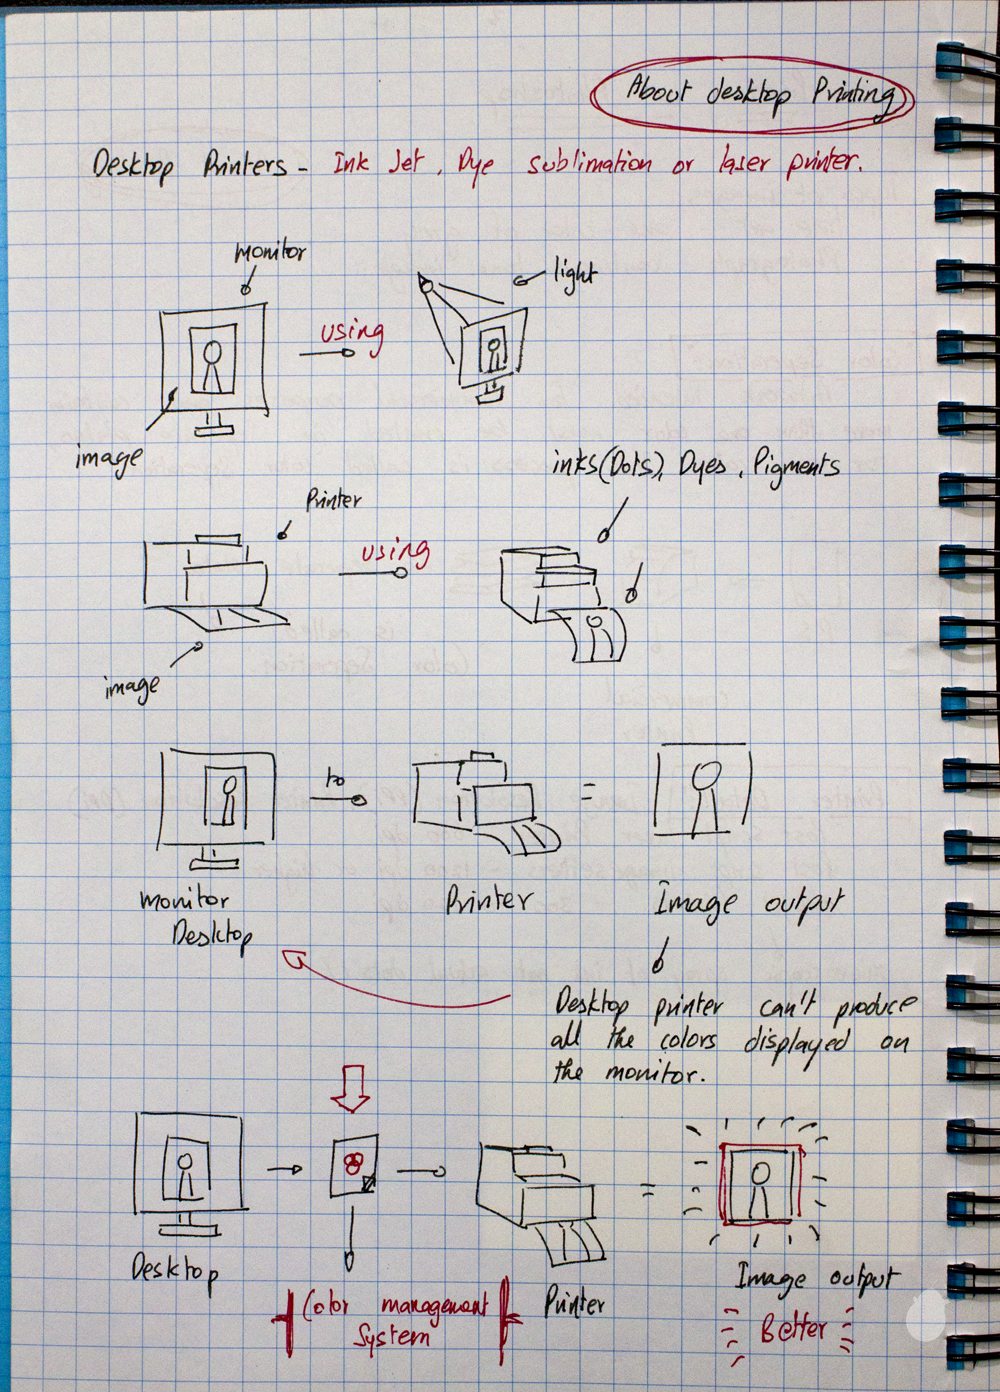
Very important thing to understand is that your Computer displays the image through lights and printer reproduce those images using inks, there’s always a breaking point between these two, hence printer cannot produce exactly what you see on the monitor, but by incorporating color management you can create a bridge between these two and you can get predictable results you want.
05. Do i need to convert my image if iam printing on my desktop printer?
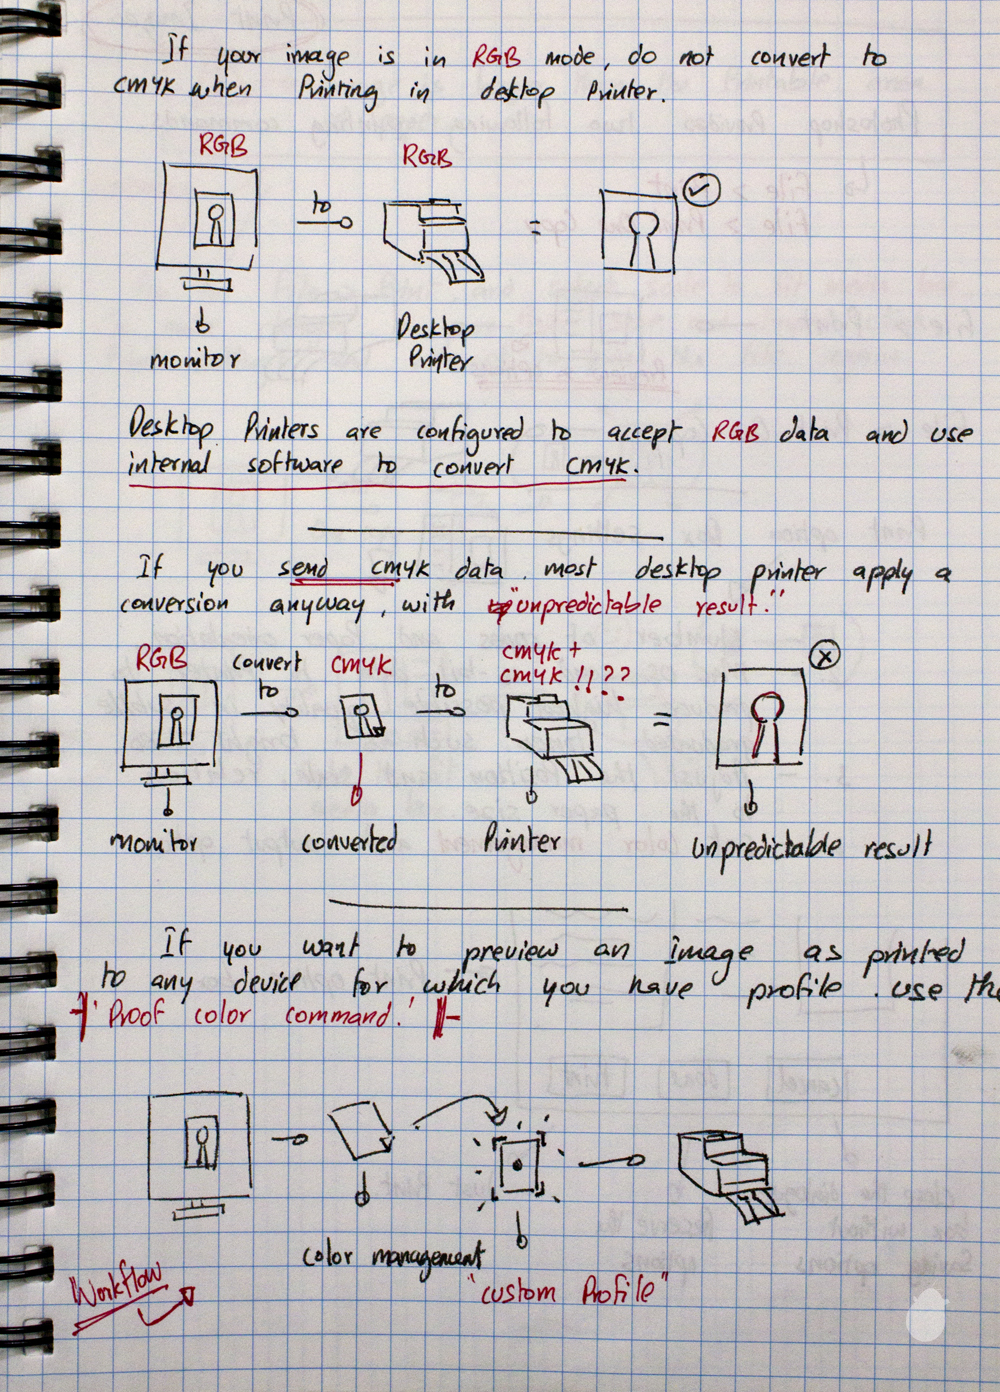
No, There won’t be any convertion needed if you are printing to your desktop printer. The image you have on your monitor will most likely be on RGB mode, you can send the image to the same mode without converting to CMYK.
Desktop printers are configured to accept RGB data and it uses internal software to convert to CMYK automatically. But, if you convert the image from RGB to CMYK and send it to your printer you might get unpredictable result, because your printer still do the converstion no matter what mode its coming in.
06. How to preview my image before i send it to the printer?
You can use ‘Proof Colors’ command to preview your image, it’ll be under View > Proof Colors (Ctrl + Y), proof color displays color based on the proof setup which is above the proof color on the same view menu.
07. I have two option in the file menu ‘Print’ and ‘Print One Copy’ which one i choose?
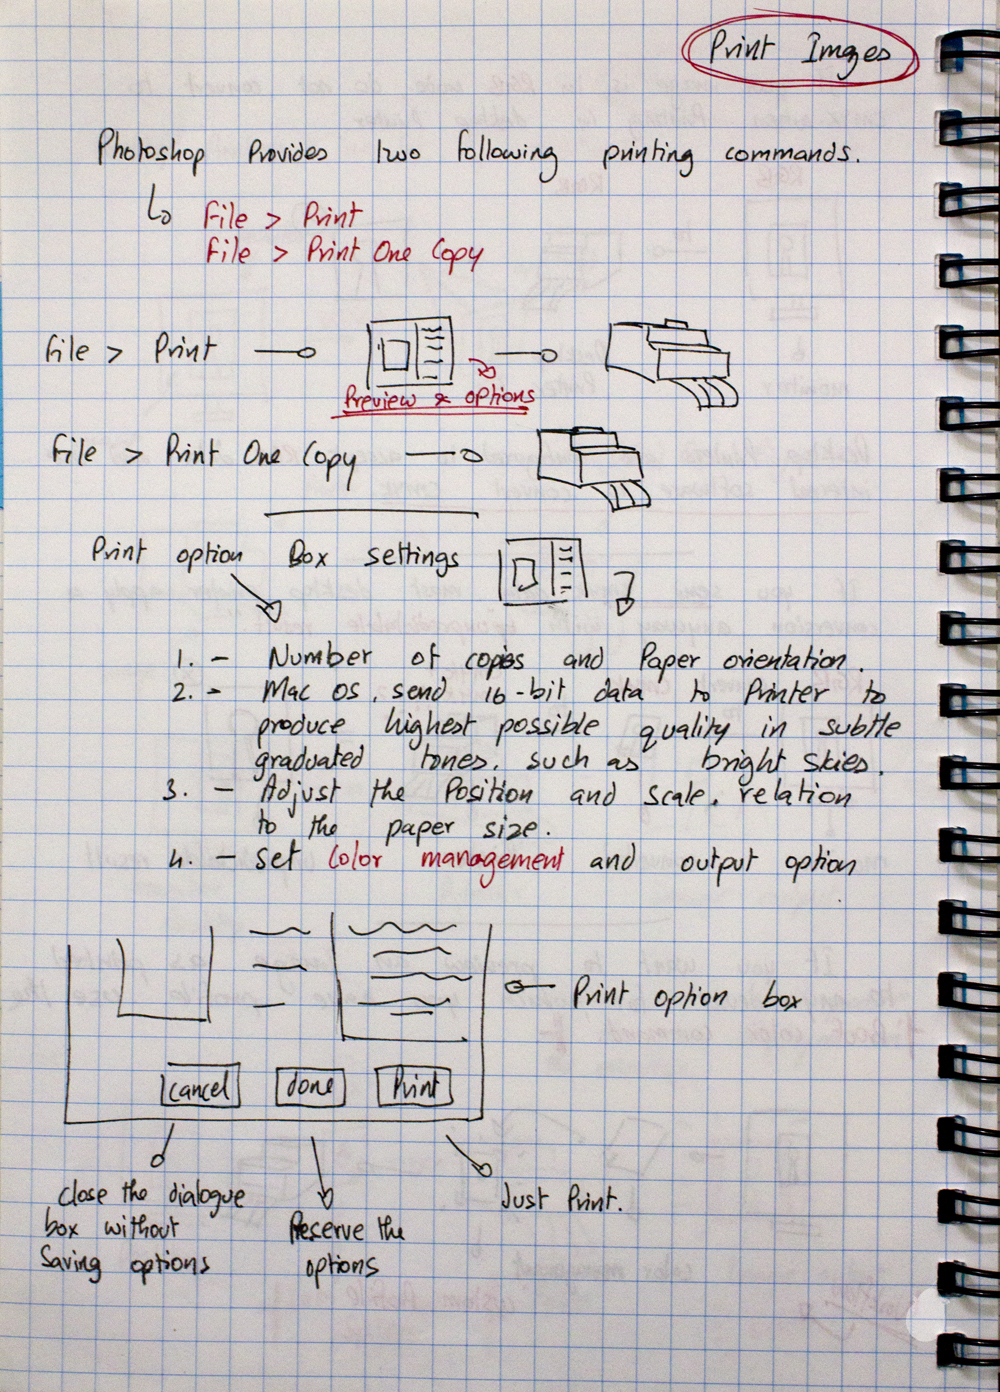
File > Print (Ctrl + P), will give you a dialogue box which has all the print settings you need, like how many print copy you want?, where to position your image, setting up color management for better quality, setting up registration mark for your commercial printer, whether you want photoshop to handle colors or you want to give it to printer, setting up the orientation and so on..
File > Print One copy (Ctrl + Shift +Alt + P), will just print one copy without displaying any dialogue box.
08. If i scale the image in the print dialogue box, will that affect my original opened image?
No it does not. Your image is determined by the document size in the image size dialogue box, Image > Image Size (Ctrl+Alt+I)). If you do any modification for scaling or orientation or resolution on the Print dialogue box it will affect only the output printed image and not your original image.
09. How do i freely move my image on the print dialogue box?
You have to deselect the ‘Center Image’ on the position option, by doing that you can move your image freely and as well as you can type the exact value on the top and left.
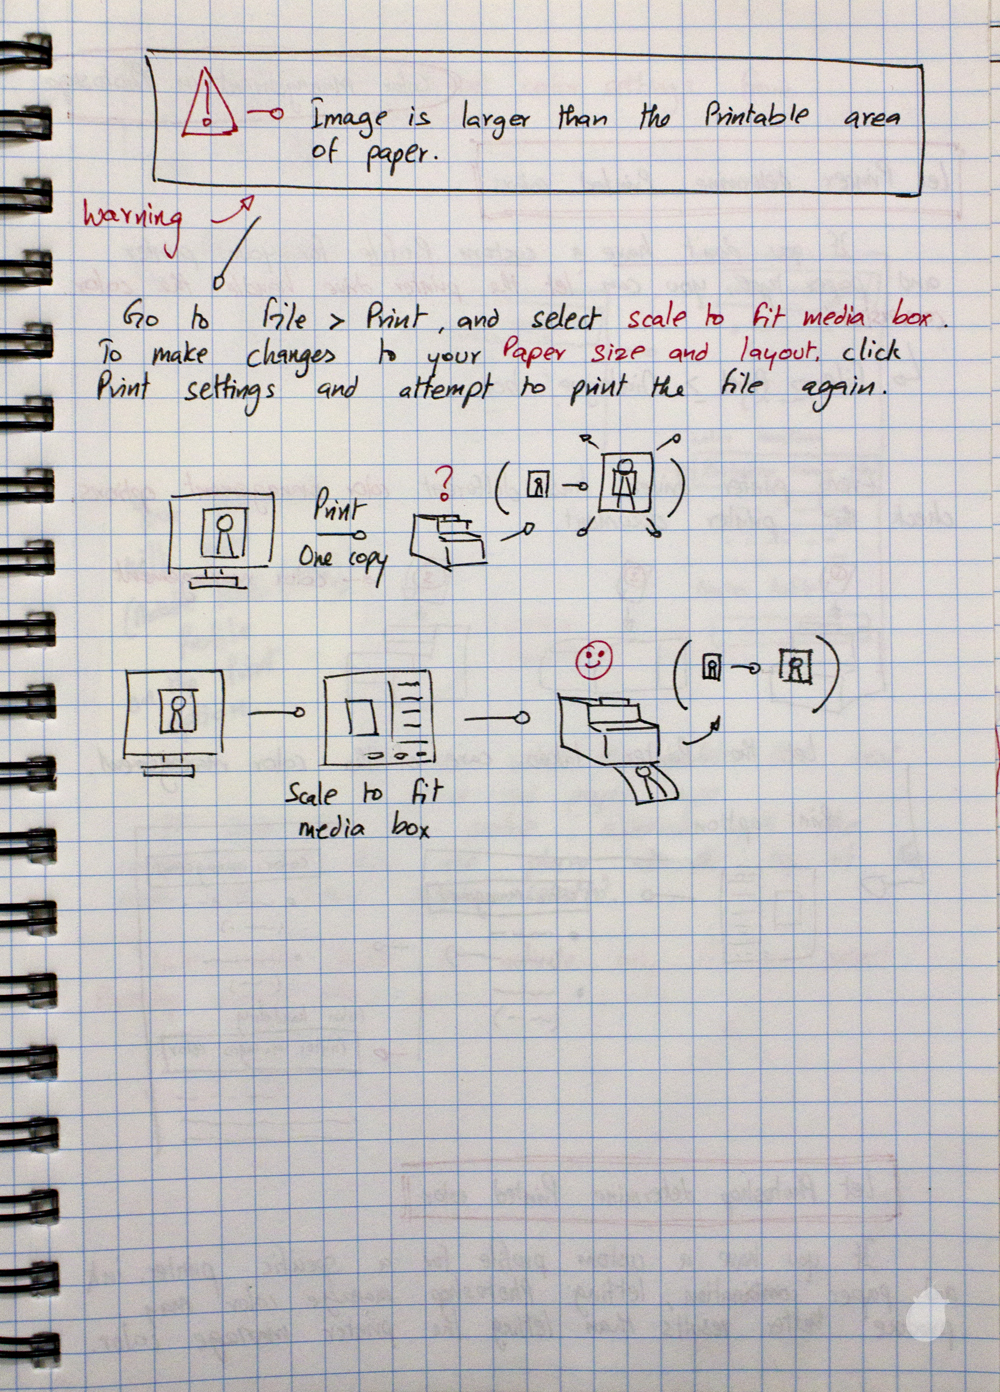
10. When i print my image it went outside my printed paper, how do i see all the image?
On the print dialogue box Select the ‘Scale to fit Media’ on the scaled print size option. This will fit all your image into the paper size. If you want to reduce even further you can use the Height and Width value box, or you can use the corner handle on the image to resize freely.
You can see the print resolution (ppi) of the selected dimension below.
11. How my Type files such as vector data is printed?
If you have vector data such as Type or Shape in your image, photoshop can send that vector data to postscript printer. You can select include vector data on the print dialogue box, by default this options is selected and photoshop automatically recognize the vector file. If not, then you can do manually.
Go to Print dialogue box, on the extreme right you should see ‘Color Management’ drop down menu, under the color management you will see ‘Output’. In the Output settings there’s a ‘Include Vector Data’ on the last in the fuctions area.
By selecting this option, each type layer or shape layer will be send to printer in a separate image and it will be printed on top of the base image and clipped using vector outline.
12. What about the resolution for the vector data?
Now that we have selected the ‘Include Vector Data’ option the vector graphic will be printed at the printer’s full resolution, even if you image layer is limited to the resolution of your image file.
13. What is ‘Cancel’, ‘Done’ and ‘Print’?
Cancel is to close the print dialogue box, without doing anything.
Done is to preserve all the options you made on for setting on the print dialogue box.
Print is to print the image.
(You can print one copy of the image by holding ‘Alt’ and clicking the ‘Print’ button. When you hold Alt the Print button will change to ‘Print One’.)
No comments:
Post a Comment