

Before we see the 'Slice Select Tool', lets look at how the slice works and how they have arranged and slice the image into different sections.
This is just a very basic understanding of slices in a layman's term. If you know how the slice works then you can skip this and go to the second part of this essential >> Essential for Slice Select Tool - II
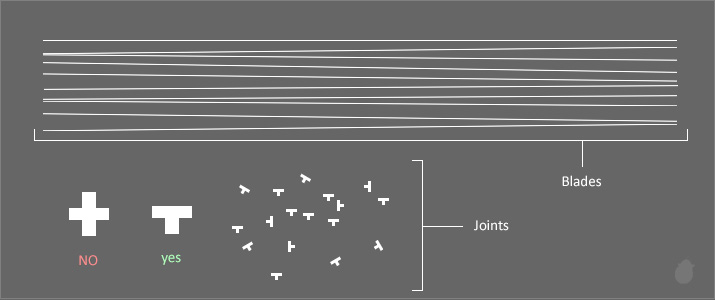
Starting with a very basic, lets say we have a bunch of thin blades and a couple of joints. The joints have only three sides and not four.
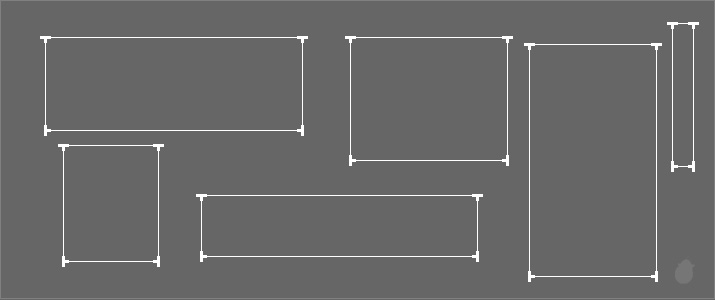
With the joint you can attach these blades and create a frame.
Because of the openings in the joint, a frame can have only four sides and it will cut any objects with four sides.
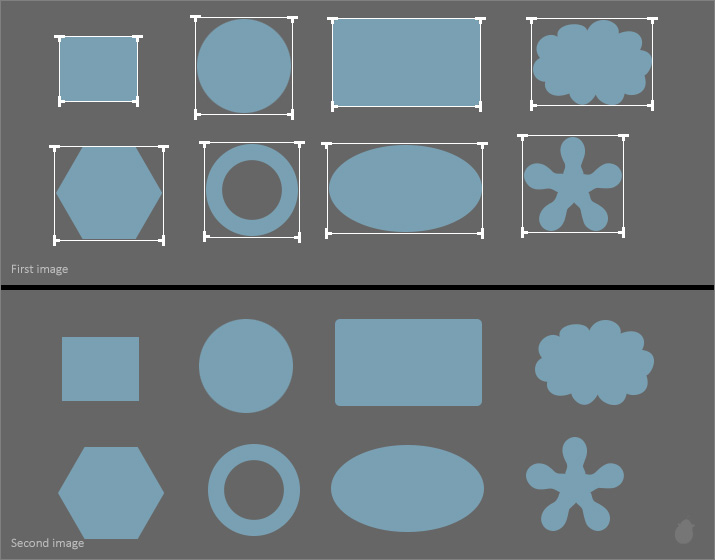
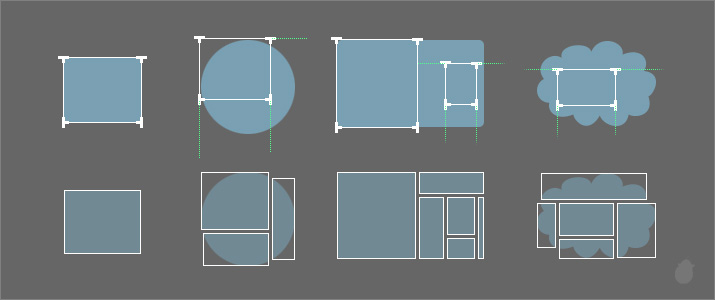
Here (fig 3.0) we have a couple of objects in different shapes, and lets place the frame here to cover each and every object.
We cannot bend the frame, so what we can do is to adjusting it to match the outside of each and every shape. If we cut the objects with these frames then the output will be the same (second image) because all the blades are outside the object and nothing there to cut.
Now think of the frames as slice (slicing the objects) and think of these objects as image.
Lets see what happen if we make a smaller slice (fig 4.0).
Any time you make a slice smaller than the actual image size then there's a default slice create from those opened joint. And the output will have many pieces of the same image because we have reduced the frame size.
Now what are these default Slices?
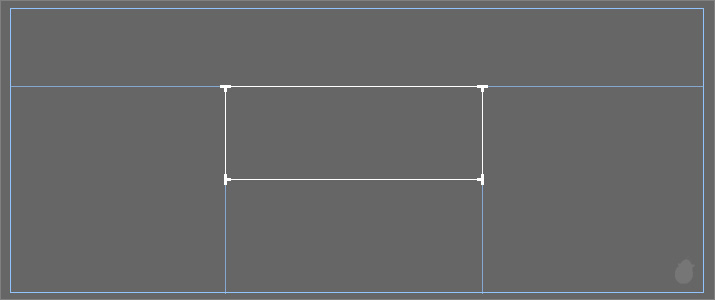
A slice is made by a user (we) with the help of slice tool. The default slice is made by the computer (photoshop). A default slice will create only if there's a loose end.
Because with the slice tool we can draw a slice with only four sides and left with 4 opened joints. Photoshop will link those joints with the neighboring slice. If there is no neighboring slice then it will link with the document slice.
(Everytime you open a new document or an image or create something inside photoshop, there will be a default slice in the border always. You cannot delete this.)
The white slice is created by us, and the blue slice is created by photoshop.
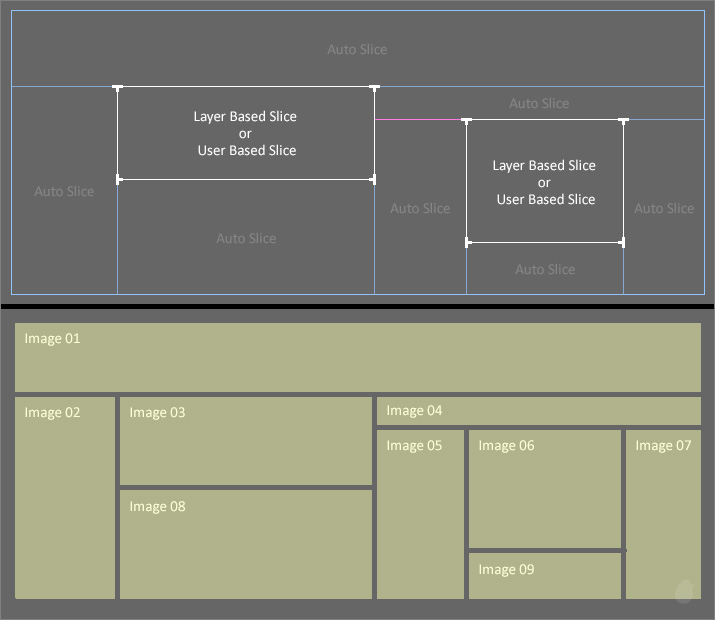
Each and every slice has a name to identify. So its easy to edit them later.
The second image will show you the output of the image. Remember, the purpose of the slice is to 'separate' the image into pieces and it doesn't matter who created the slice.

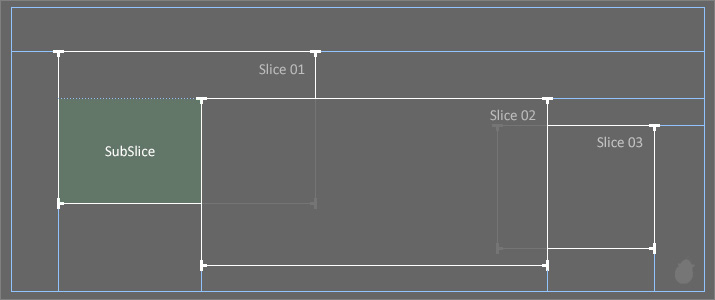
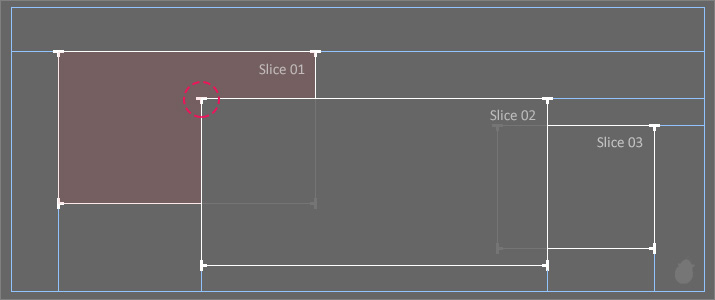
Not all the auto slices are link with the document frame. The first image (fig 6.0) will have a pink line which created from the second slice. That is also an auto slice.
All the joint must be close, since 'slice 01' is the neighboring slice for 'slice 02', so the auto slice linked to 'slice 01'. Remember, the pattern of the slice (like in fig 5.1) will always be the same.
Because all the joints must close. If the joints that falls outside each of the frame, then it will be closed with auto slice. If it falls inside any of the frame then it will be closed with 'Subslice'.
Subslice will change based on the overlaps.
Notice below, the Slice 02 is on top of slice 01 with an open joint, so it must be closed.
Whereas Slice01 (bottom right) and Slice 03 (left side) joints are still open, but that cannot been seen because they are behind slice 02.
Why there are so many slices?
Because, the joints must close and it should have only four sides. If there is no blade comes out from the top left of slice 02 (fig 7.1) then slice 01 will have 6 sides. Hence the new subslice.
The subslice will create only if the 'joint' falls into another slice. Notice slice 02 and slice 03 doesn't have any subslice even though they overlap each other.
But if Slice 03 is on top of slice 02 then it will create two subslice, because of the two open joints.
Here's a little comparison of how the subslice creates. None of the slices are moved from its place, only the overlay order is changed.
Hope you got a better understanding of the slice pattern and how it works with different shapes. Next essential we'll look at how we can create all these slices inside photoshop.
Next Essential >> Essential for Slice Select Tool 2
This is just a very basic understanding of slices in a layman's term. If you know how the slice works then you can skip this and go to the second part of this essential >> Essential for Slice Select Tool - II
Starting with a very basic, lets say we have a bunch of thin blades and a couple of joints. The joints have only three sides and not four.
With the joint you can attach these blades and create a frame.
(fig 1.0)
Because of the openings in the joint, a frame can have only four sides and it will cut any objects with four sides.
(fig 2.0)
Here (fig 3.0) we have a couple of objects in different shapes, and lets place the frame here to cover each and every object.
We cannot bend the frame, so what we can do is to adjusting it to match the outside of each and every shape. If we cut the objects with these frames then the output will be the same (second image) because all the blades are outside the object and nothing there to cut.
Now think of the frames as slice (slicing the objects) and think of these objects as image.
(fig 3.0)
Lets see what happen if we make a smaller slice (fig 4.0).
Any time you make a slice smaller than the actual image size then there's a default slice create from those opened joint. And the output will have many pieces of the same image because we have reduced the frame size.
Now what are these default Slices?
(fig 4.0)
A slice is made by a user (we) with the help of slice tool. The default slice is made by the computer (photoshop). A default slice will create only if there's a loose end.
Because with the slice tool we can draw a slice with only four sides and left with 4 opened joints. Photoshop will link those joints with the neighboring slice. If there is no neighboring slice then it will link with the document slice.
(Everytime you open a new document or an image or create something inside photoshop, there will be a default slice in the border always. You cannot delete this.)
The white slice is created by us, and the blue slice is created by photoshop.
(fig 5.0)
Each and every slice has a name to identify. So its easy to edit them later.
| The slice created with slice tool are called 'User Based slice' (manually created) |
| The slice created from the layer are called 'Layer Based slice' (based on the shape of the object in the layer) |
| The slice that are created automatically are called 'Auto slice' also 'SubSlice' (to fill the gaps) |
The second image will show you the output of the image. Remember, the purpose of the slice is to 'separate' the image into pieces and it doesn't matter who created the slice.
(fig 5.1)
Not all the auto slices are link with the document frame. The first image (fig 6.0) will have a pink line which created from the second slice. That is also an auto slice.
All the joint must be close, since 'slice 01' is the neighboring slice for 'slice 02', so the auto slice linked to 'slice 01'. Remember, the pattern of the slice (like in fig 5.1) will always be the same.
(fig 6.0)
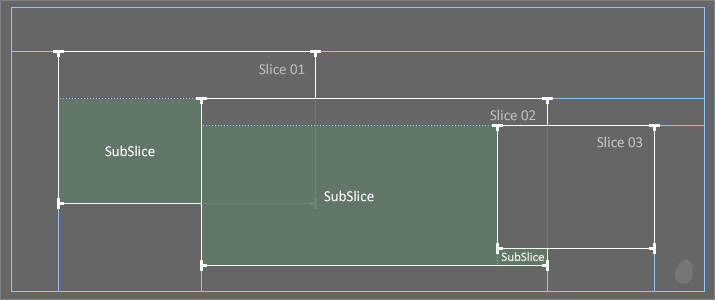
If two or more slice overlaps, there's a third slice which creates are called 'Subslice'.Because all the joints must close. If the joints that falls outside each of the frame, then it will be closed with auto slice. If it falls inside any of the frame then it will be closed with 'Subslice'.
Subslice will change based on the overlaps.
Notice below, the Slice 02 is on top of slice 01 with an open joint, so it must be closed.
Whereas Slice01 (bottom right) and Slice 03 (left side) joints are still open, but that cannot been seen because they are behind slice 02.
(fig 7.0)
Why there are so many slices?
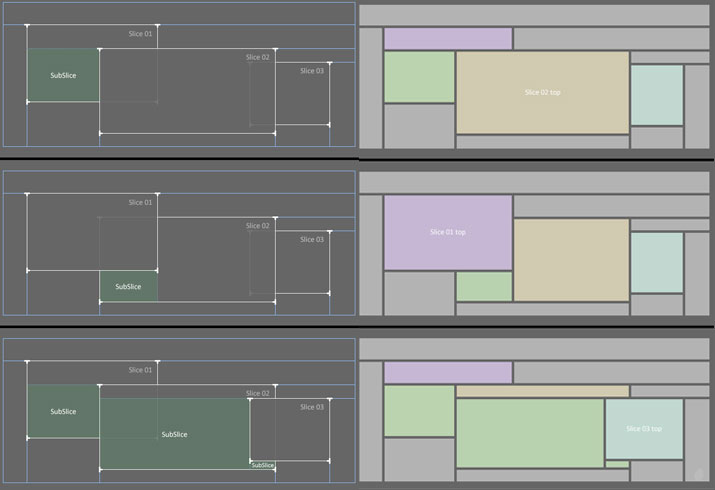
Because, the joints must close and it should have only four sides. If there is no blade comes out from the top left of slice 02 (fig 7.1) then slice 01 will have 6 sides. Hence the new subslice.
The subslice will create only if the 'joint' falls into another slice. Notice slice 02 and slice 03 doesn't have any subslice even though they overlap each other.
(fig 7.1)
But if Slice 03 is on top of slice 02 then it will create two subslice, because of the two open joints.
(fig 7.2)
Here's a little comparison of how the subslice creates. None of the slices are moved from its place, only the overlay order is changed.
(fig 8.0)
Hope you got a better understanding of the slice pattern and how it works with different shapes. Next essential we'll look at how we can create all these slices inside photoshop.
Next Essential >> Essential for Slice Select Tool 2
No comments:
Post a Comment