
Typing inside the path is like a Paragraph type, everything wraps automatically when we adjust the path.
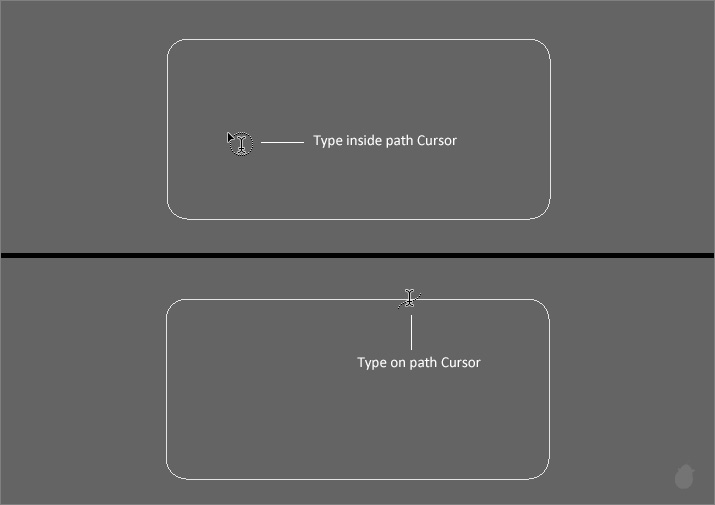
Type on path and Type inside path cursor's are not normally visible, more or less like a hidden cursors. These cursors visible only if you have a path or shape in the work area. When the path is closed, bringing the Type tool inside the path will display a I-beam cursor with dotted circle.
Moving the cursor towards the outline will display the I-beam with a S curve.
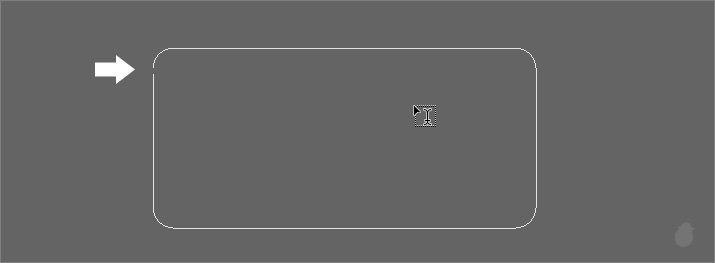
If you bring the cursor inside the path and if you do not see the cursor change, then most likely you have an open path. If the path is simple it is easily noticeable.
Without closing the path and clicking will display point type.
Learn more about Point type >> Essential for Type tool 1
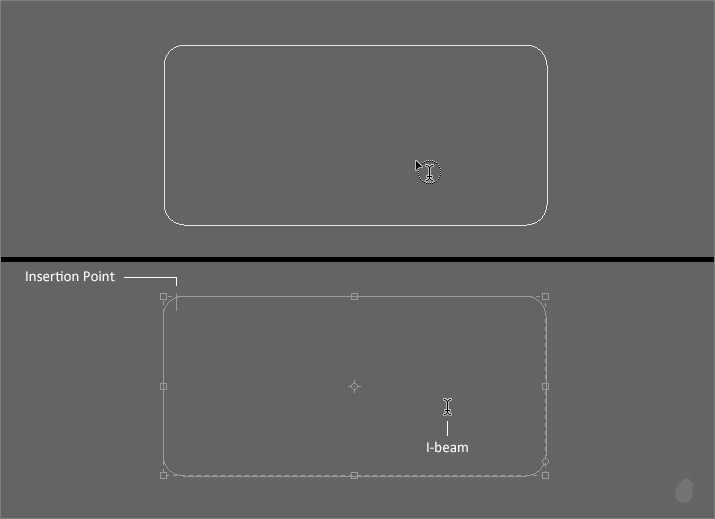
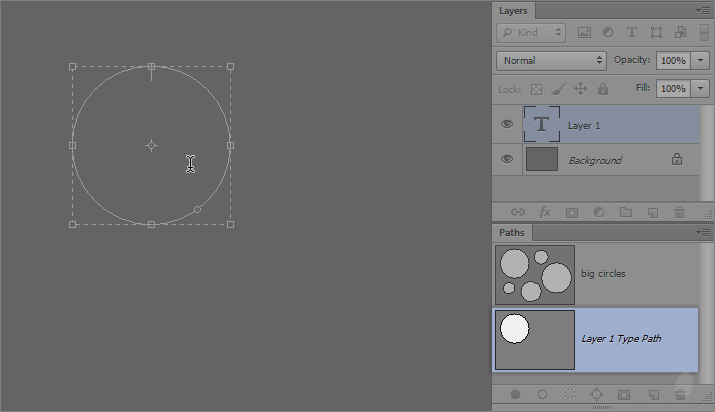
A closed path cursor will have a I-beam inside a full dotted circle (fig 3.0). Clicking inside will brings a bounding box around the path with an insertion point at the top, just like Paragraph type.
Anything we type will stays inside the path, think of it like a mask for the text wrap. Just like Paragraph type an overflow icon at the bottom right will appears if the text is longer than the path boundary.
The bounding box appears only if you are in the Edit Mode.
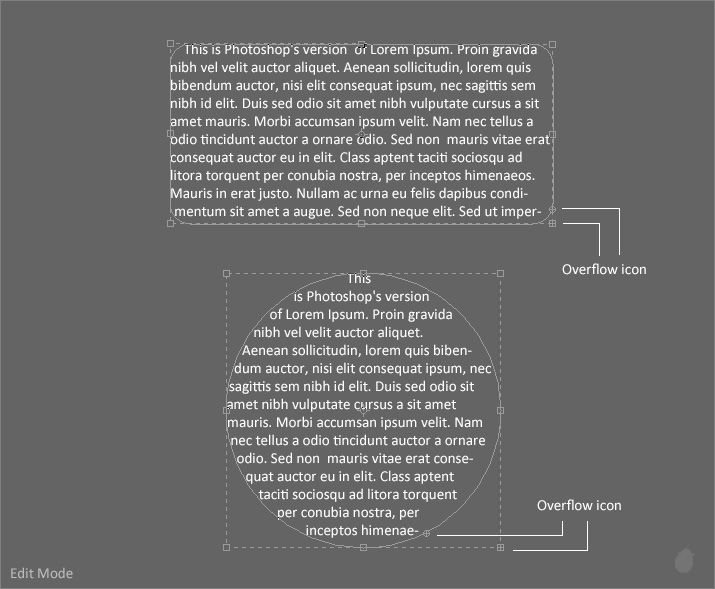
After we commit the text, we can still see the overflow icon in the path.
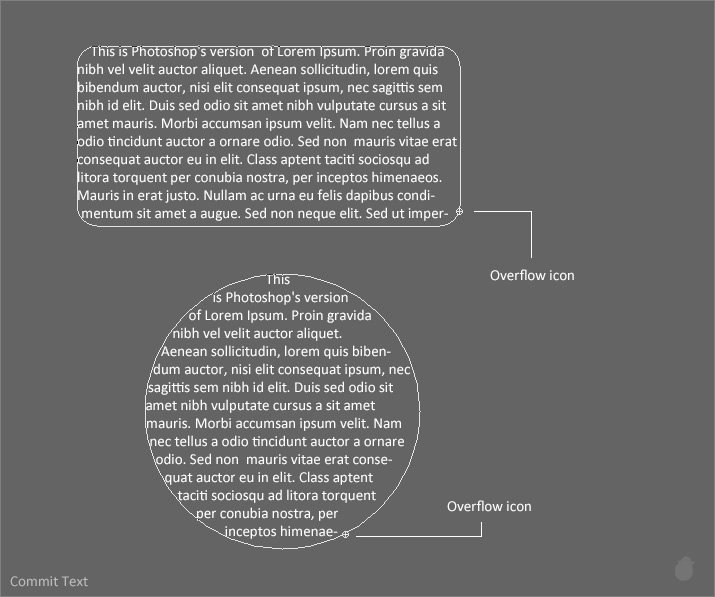
If the text is shorter and everything fits inside the path, only the circle is visible at the bottom right. Note this circle is not one of those anchor point to create the sphere (fig 4.0).
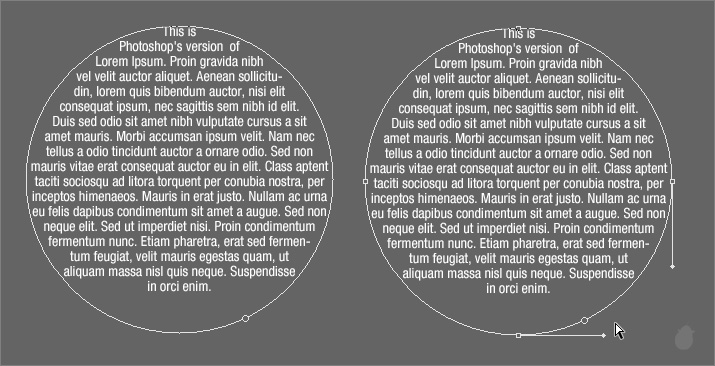
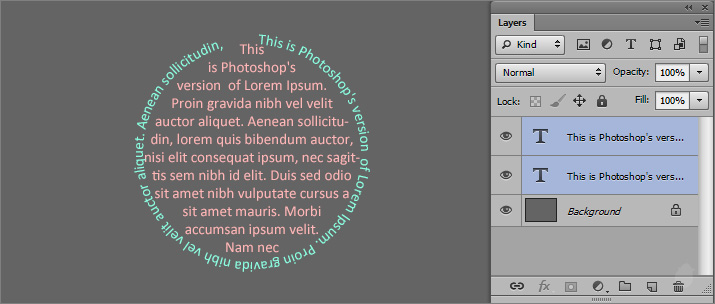
Having a text both outside and inside in a single path is not possible. The baseline is dedicated to only one path control and it'll be linked with its own text layer.
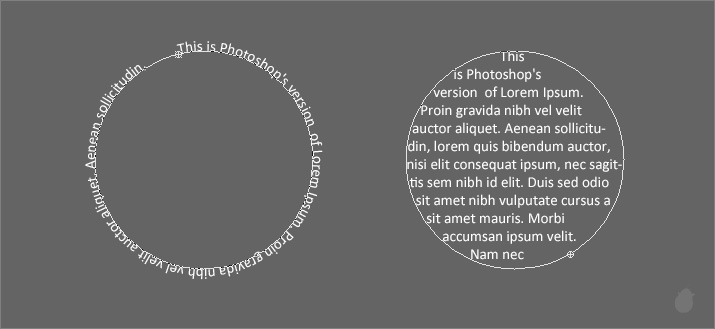
Let's say we need to make something like this (fig 5.1). Just like the above example (fig 5.0) i have used type on path once, and type inside path again and both of them are positioned in the same place. Notice there are two layers.
// Download the Exercise file to follow along with me >> Type inside Path.zip
(There are two shapes inside this file, which are taken from '100 Vector Scalable Cross Silhouettes'. we are going to use a simple path/shape to explain here. The exercise file is for you to practice.)
Lets see how multiple shapes work. I have created these with the Ellipse tool with the option set to Path in the options bar.
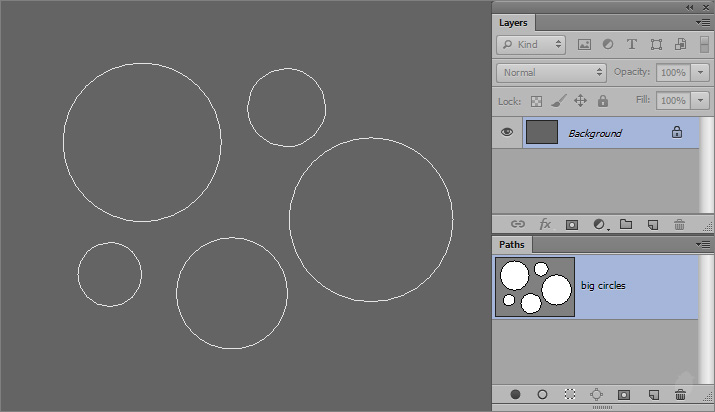
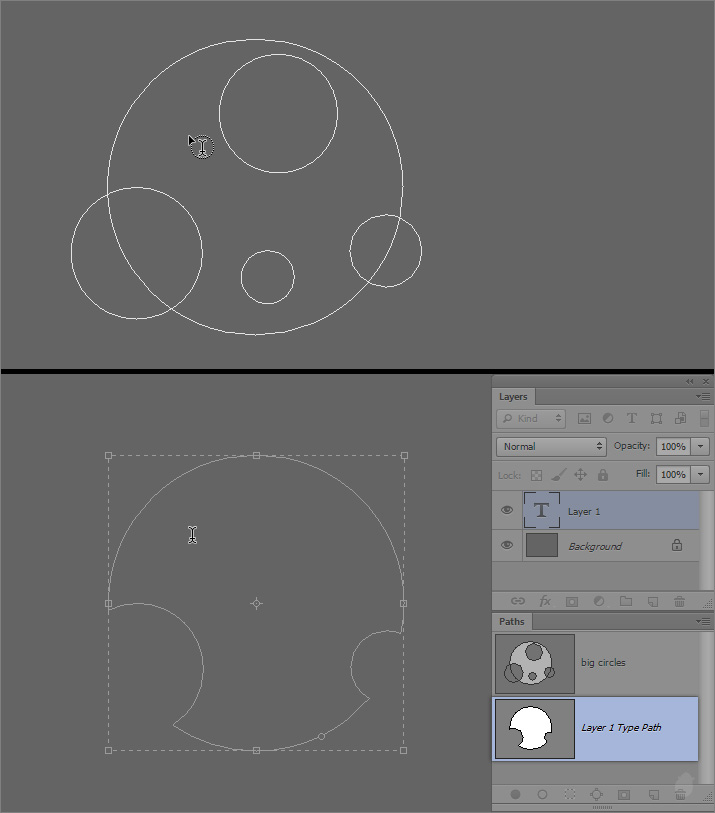
If we mouse-click on one of the closed path, only the selected circle is created in the paths panel. Even though all other circles are in a same path layer, they are still separated.
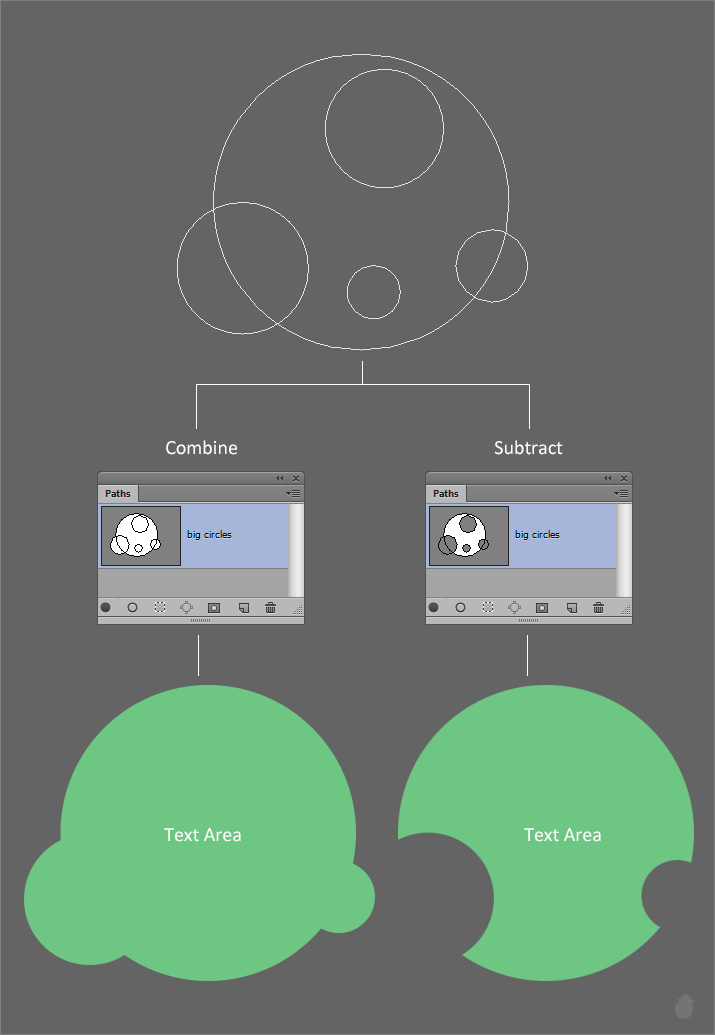
Since it sees only the outline of the path, lets see how the subtract option works.
I have created some spheres on top of one other (fig 7.0 - 1). In the second image I have selected all the small ones and set the option to 'Subtract Front Shape' from the options bar (fig 7.0 - 2). Since we do not have any color, it's hard to see it in the work area, the paths panel will give a clear preview of the path operations.
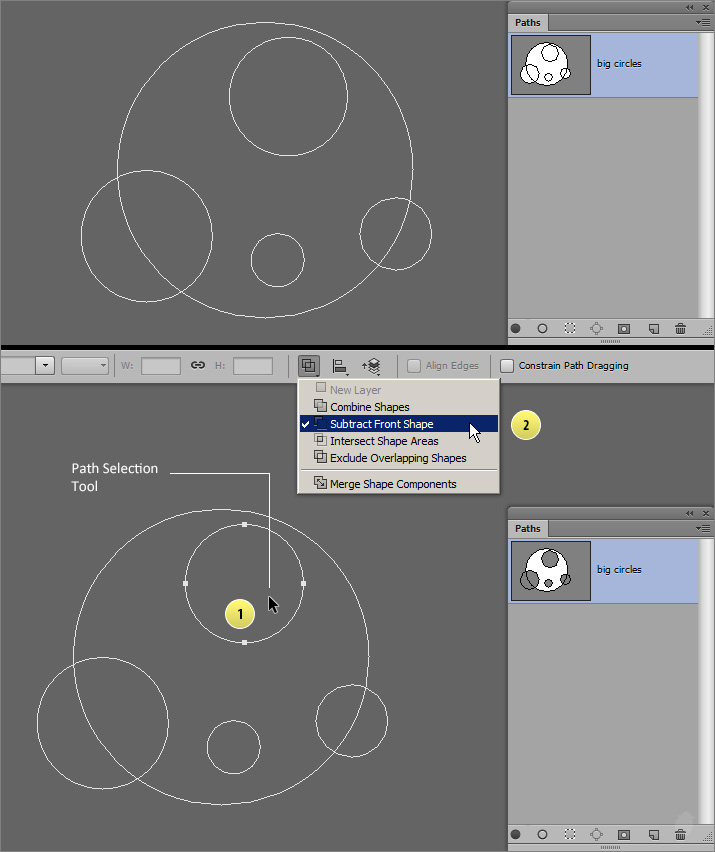
Here's the same preview in a bigger size (fig 7.1). If we use the path operation as Subtract from the options bar it should look like this (the green color).
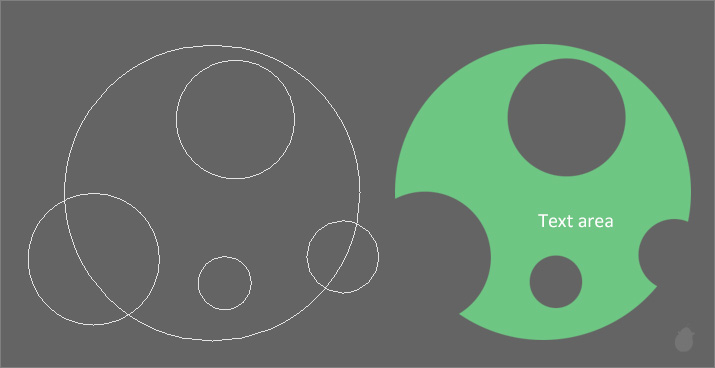
Let's see the cursor placement first, since we have subtracted the small spheres it leave a hole. Placing the cursor in those spheres will display only the 'Type tool'. But what we need is a 'Type inside path' cursor. So move the cursor where it turns to a I-beam with dotted circle.

Now that we have placed the cursor in the right place (fig 7.3). If we click, the path outline knocks off all our inside paths and it kept only the outer ones. What is happening here?
Well, all it need is a closed path, it doesn't care about the others. If we have any path inside or outside, it will be removed completely. So before fill in with any text, make sure you do not have any loose end.
Check the path's panel, the original 'big circles' is still there.
This (fig 7.4) will give you an idea of how the path operation works with the Type inside path.
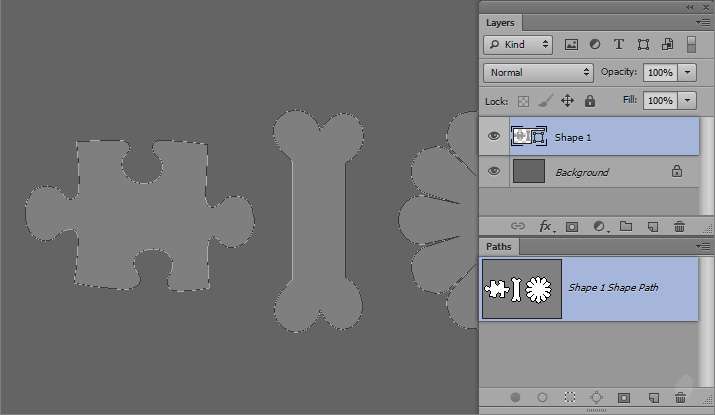
Type inside path also work with shapes. I have selected these from the custom shape picker with custom shape tool , these are default Photoshop shapes that ship along with the software.
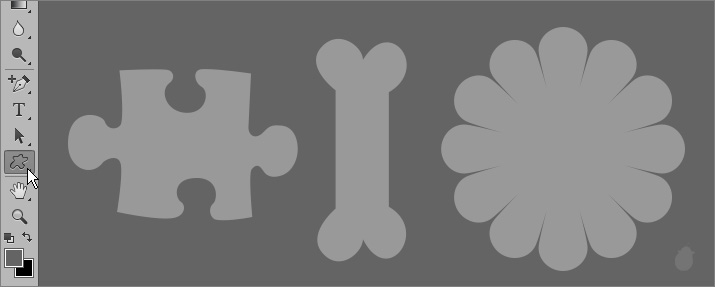
Whenever we create any shape, both layer and a path creates in their own palette. A layer will handle all the color and effects and the path will have the path controls. You can also deselect the path and see only the shape layer.
Learn more about how to hide path >> Photoshop Tutorial 05
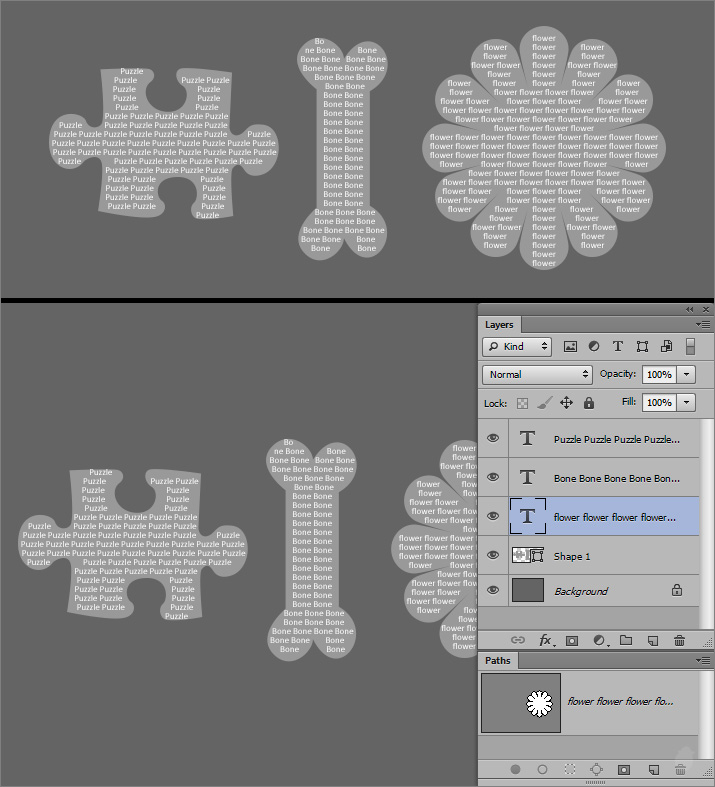
Just like the text wrap inside the path, we now have a text wrap inside the shape. Since we have a multiple shapes, each one takes its own layer (fig 8.2).
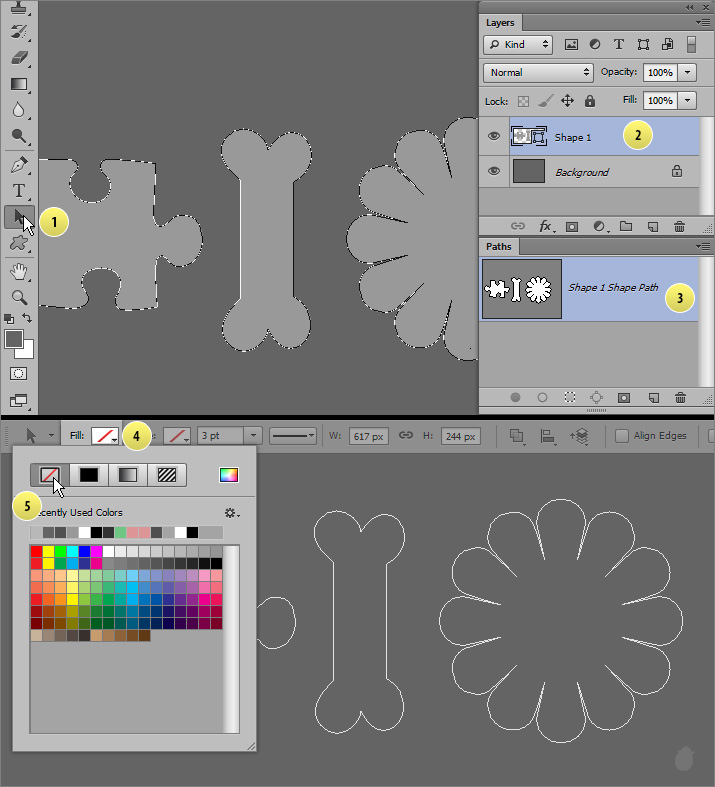
You can also turn off the color for the shape layer and to see only the path. Select the Path selection tool from the toolbar and select the shape layer in the layers palette, it automatically selects the path layer, if not select it manually to make the path visible. Go to the Options bar (fig 9.0) and select 'No Fill' as the fill option.
Alternatively you could also turn off the visibility for the shape layer from the layers palette and select only the path layer.
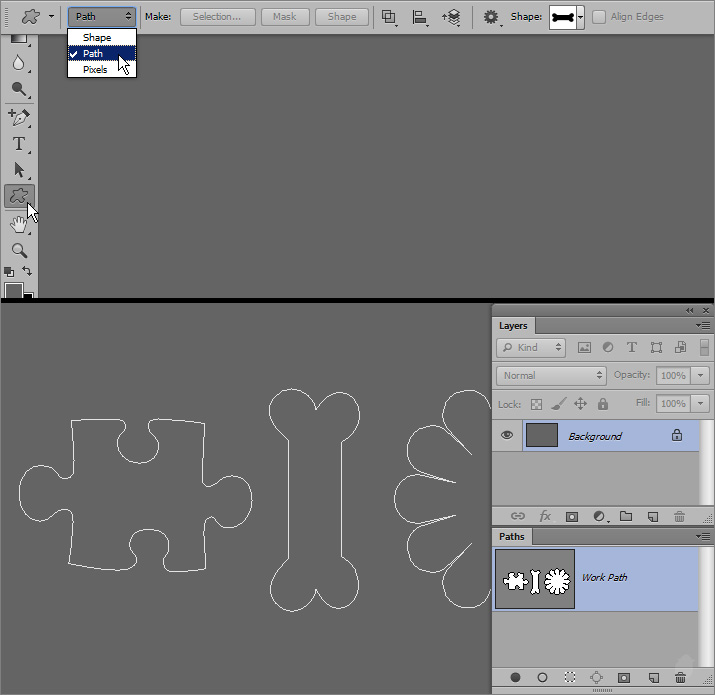
Before you make any shape if you choose 'Path' from the options bar (fig 10.0 - 1) and draw a shape in the work area, you will see only the path in the paths panel and no shape layer will creates in the layers palette (fig 10.0 - 2).
Creating type on path and inside the path will expands our typography skill even further and give us more creative ideas.
Next Essential >> Essential for Type tool 7

Type on path and Type inside path cursor's are not normally visible, more or less like a hidden cursors. These cursors visible only if you have a path or shape in the work area. When the path is closed, bringing the Type tool inside the path will display a I-beam cursor with dotted circle.
Moving the cursor towards the outline will display the I-beam with a S curve.
(fig 1.0)
If you bring the cursor inside the path and if you do not see the cursor change, then most likely you have an open path. If the path is simple it is easily noticeable.
Without closing the path and clicking will display point type.
Learn more about Point type >> Essential for Type tool 1
(fig 2.0)
A closed path cursor will have a I-beam inside a full dotted circle (fig 3.0). Clicking inside will brings a bounding box around the path with an insertion point at the top, just like Paragraph type.
(fig 3.0)
Anything we type will stays inside the path, think of it like a mask for the text wrap. Just like Paragraph type an overflow icon at the bottom right will appears if the text is longer than the path boundary.
The bounding box appears only if you are in the Edit Mode.
(fig 3.1)
After we commit the text, we can still see the overflow icon in the path.
(fig 3.2)
If the text is shorter and everything fits inside the path, only the circle is visible at the bottom right. Note this circle is not one of those anchor point to create the sphere (fig 4.0).
(fig 4.0)
Having a text both outside and inside in a single path is not possible. The baseline is dedicated to only one path control and it'll be linked with its own text layer.
(fig 5.0)
Let's say we need to make something like this (fig 5.1). Just like the above example (fig 5.0) i have used type on path once, and type inside path again and both of them are positioned in the same place. Notice there are two layers.
(fig 5.1)
// Download the Exercise file to follow along with me >> Type inside Path.zip
(There are two shapes inside this file, which are taken from '100 Vector Scalable Cross Silhouettes'. we are going to use a simple path/shape to explain here. The exercise file is for you to practice.)
Lets see how multiple shapes work. I have created these with the Ellipse tool with the option set to Path in the options bar.
(fig 6.0)
If we mouse-click on one of the closed path, only the selected circle is created in the paths panel. Even though all other circles are in a same path layer, they are still separated.
(fig 6.1)
Since it sees only the outline of the path, lets see how the subtract option works.
I have created some spheres on top of one other (fig 7.0 - 1). In the second image I have selected all the small ones and set the option to 'Subtract Front Shape' from the options bar (fig 7.0 - 2). Since we do not have any color, it's hard to see it in the work area, the paths panel will give a clear preview of the path operations.
(fig 7.0)
Here's the same preview in a bigger size (fig 7.1). If we use the path operation as Subtract from the options bar it should look like this (the green color).
(fig 7.1)
Let's see the cursor placement first, since we have subtracted the small spheres it leave a hole. Placing the cursor in those spheres will display only the 'Type tool'. But what we need is a 'Type inside path' cursor. So move the cursor where it turns to a I-beam with dotted circle.
(fig 7.2)
Now that we have placed the cursor in the right place (fig 7.3). If we click, the path outline knocks off all our inside paths and it kept only the outer ones. What is happening here?
Well, all it need is a closed path, it doesn't care about the others. If we have any path inside or outside, it will be removed completely. So before fill in with any text, make sure you do not have any loose end.
Check the path's panel, the original 'big circles' is still there.
(fig 7.3)
This (fig 7.4) will give you an idea of how the path operation works with the Type inside path.
(fig 7.4)
Type inside path also work with shapes. I have selected these from the custom shape picker with custom shape tool , these are default Photoshop shapes that ship along with the software.
(fig 8.0)
Whenever we create any shape, both layer and a path creates in their own palette. A layer will handle all the color and effects and the path will have the path controls. You can also deselect the path and see only the shape layer.
Learn more about how to hide path >> Photoshop Tutorial 05
(fig 8.1)
Just like the text wrap inside the path, we now have a text wrap inside the shape. Since we have a multiple shapes, each one takes its own layer (fig 8.2).
(fig 8.2)
You can also turn off the color for the shape layer and to see only the path. Select the Path selection tool from the toolbar and select the shape layer in the layers palette, it automatically selects the path layer, if not select it manually to make the path visible. Go to the Options bar (fig 9.0) and select 'No Fill' as the fill option.
Alternatively you could also turn off the visibility for the shape layer from the layers palette and select only the path layer.
(fig 9.0)
Before you make any shape if you choose 'Path' from the options bar (fig 10.0 - 1) and draw a shape in the work area, you will see only the path in the paths panel and no shape layer will creates in the layers palette (fig 10.0 - 2).
(fig 10.0)
Creating type on path and inside the path will expands our typography skill even further and give us more creative ideas.
Next Essential >> Essential for Type tool 7
No comments:
Post a Comment