

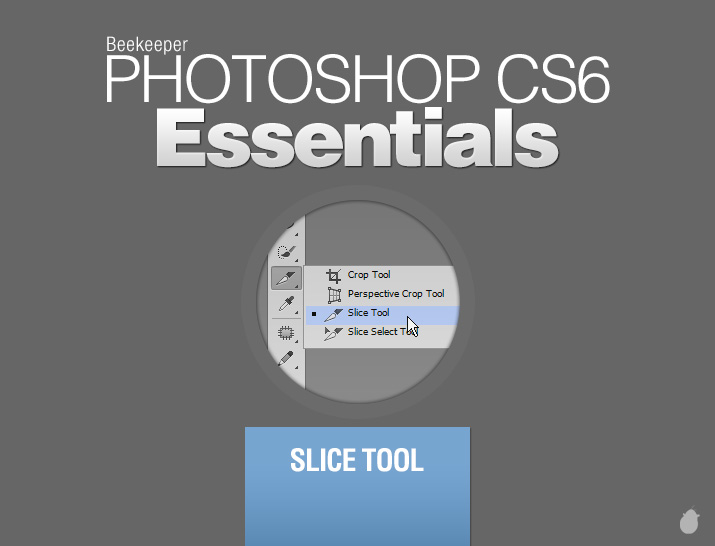
Slice tool is one of the important tool when you are designing your HTML Webpage in Photoshop. Slice tool helps you to cut the image and export with different compression settings for HTML or CSS.
After you have sliced the image you can assign different URL, target, alt text to each and individual slices, which will reflect in the HTML code. This is a great time saver if you want to create a simple HTML webpage with basic interactions.

Slicing your image means cutting your image into different pieces, so you can optimize your image for HTML. When you slice your image inside photoshop, it doesn't really cut your image. It is just a guide for you to see how the images is going to be cut when you export them.
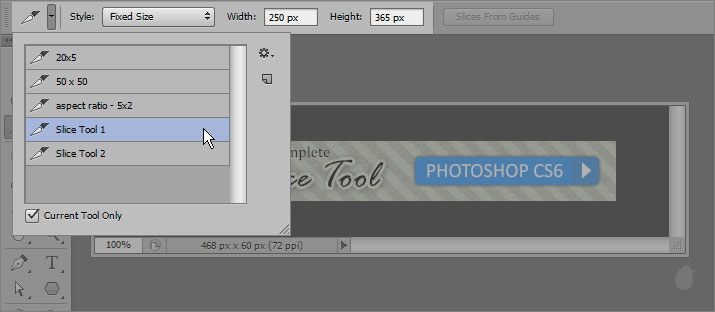
1. Tool Preset
You can create your own preset using the width and height value. These presets come in handy when you want to repeat the slice in many images.
Enter the values in the width and height field and open the tool preset and click new to save them to the list. If you see other tools and not the slice tool preset inside the tool preset panel, then click the ‘Current Tool Only’ at the bottom of the tool preset to display only the current tool preset.
There are two ways you can add preset, ‘Fixed Aspect Ratio’ and ‘Fixed Size’.
2. Slice Options
Style
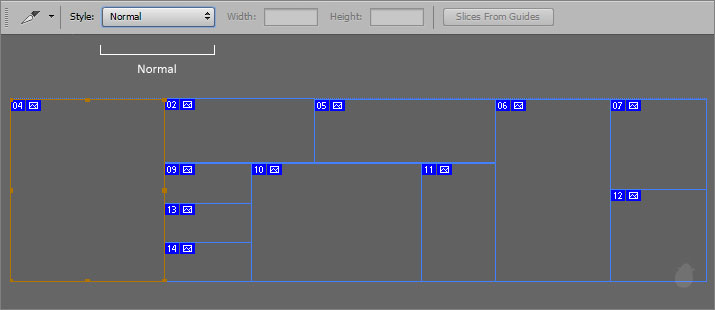
Three ways you can choose your slicing style, 'Normal' (default), 'Fixed Aspect Ratio', and 'Fixed Size'.
Normal:
When the option is set to normal style you can use the slicing without entering any value, you can start making the slice directly on the image. Normal doesn't constrain the dimensions so you can make any size you want. When normal is selected, width and height values are disabled.
Notice the different dimensions of each slice (fig 3.0).
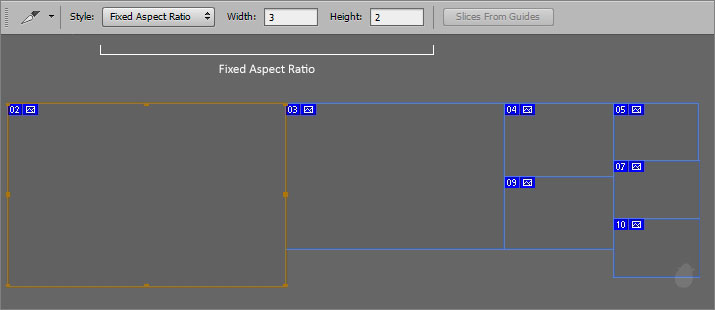
Fixed Aspect Ratio
This will constrain the aspect ratio based on the values you enter in the options bar. You can make the slice smaller or bigger but it always maintain the same aspect ratio.
Fixed Size
You can have a constant size with fixed size style. You can also save these in the tool preset for later use.
With the Fixed Size selected, just enter the values you want in the width and height text box and by clicking on the screen will display the slice without drawing.
If you want to make more than one slice with the same size, you can use divide from the 'slice select tool' to get equal proportion.
( See how to divide your slice in >> 'Essentials for Slice Select Tool')

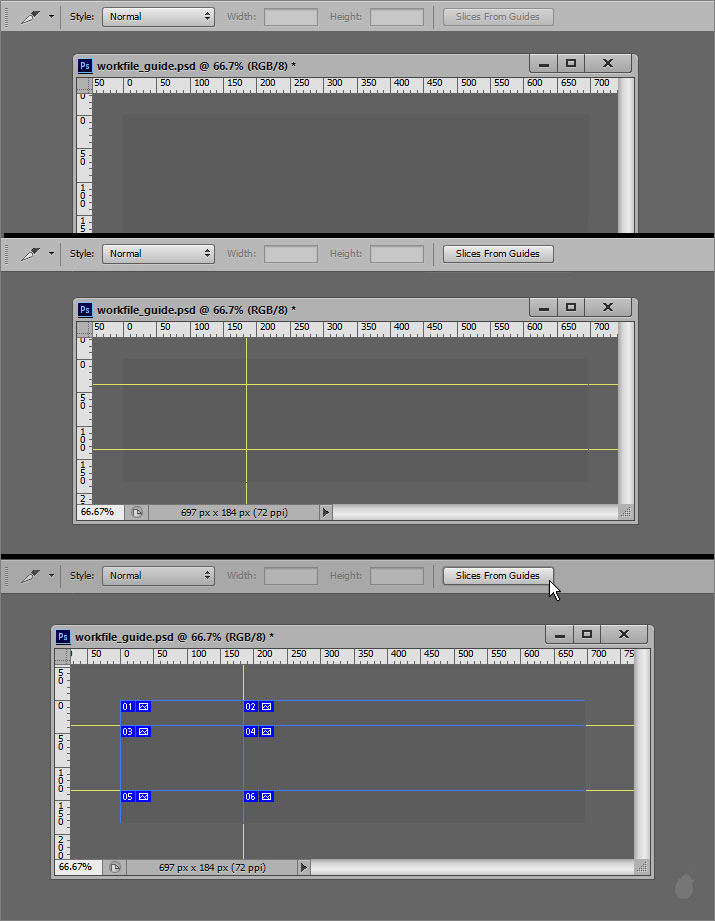
This is an another great way to make slices. Note, 'Slices from Guides' get activates only if you have any guide(s) on the screen.
Fig 6.0 will explain the process of guides to slices. Guides can be drawn with rulers, just drag from the ruler and drop it. Once you have fixed the guide, just click the button 'Slices From Guides' to convert the guides to slices. The converted slices are 'User based slice'.
(See how to create 'User Based Slice' in >> 'Essentials for Slice Select Tool')
You can also create slice based on layers you have in the layer palette, its called 'Layer Based Slice', which you can access from the layer menu.
Next Essential >> 'Essential for Slice Select Tool'
After you have sliced the image you can assign different URL, target, alt text to each and individual slices, which will reflect in the HTML code. This is a great time saver if you want to create a simple HTML webpage with basic interactions.
Slice Tool Options Bar
(fig 1.0)
Slicing your image means cutting your image into different pieces, so you can optimize your image for HTML. When you slice your image inside photoshop, it doesn't really cut your image. It is just a guide for you to see how the images is going to be cut when you export them.
1. Tool Preset
You can create your own preset using the width and height value. These presets come in handy when you want to repeat the slice in many images.
Enter the values in the width and height field and open the tool preset and click new to save them to the list. If you see other tools and not the slice tool preset inside the tool preset panel, then click the ‘Current Tool Only’ at the bottom of the tool preset to display only the current tool preset.
There are two ways you can add preset, ‘Fixed Aspect Ratio’ and ‘Fixed Size’.
(fig 2.0)
2. Slice Options
Style
Three ways you can choose your slicing style, 'Normal' (default), 'Fixed Aspect Ratio', and 'Fixed Size'.
Normal:
When the option is set to normal style you can use the slicing without entering any value, you can start making the slice directly on the image. Normal doesn't constrain the dimensions so you can make any size you want. When normal is selected, width and height values are disabled.
Notice the different dimensions of each slice (fig 3.0).
(fig 3.0)
Fixed Aspect Ratio
This will constrain the aspect ratio based on the values you enter in the options bar. You can make the slice smaller or bigger but it always maintain the same aspect ratio.
(fig 4.0)
Fixed Size
You can have a constant size with fixed size style. You can also save these in the tool preset for later use.
With the Fixed Size selected, just enter the values you want in the width and height text box and by clicking on the screen will display the slice without drawing.
If you want to make more than one slice with the same size, you can use divide from the 'slice select tool' to get equal proportion.
( See how to divide your slice in >> 'Essentials for Slice Select Tool')
(fig 5.0)
3. Slices From GuidesThis is an another great way to make slices. Note, 'Slices from Guides' get activates only if you have any guide(s) on the screen.
Fig 6.0 will explain the process of guides to slices. Guides can be drawn with rulers, just drag from the ruler and drop it. Once you have fixed the guide, just click the button 'Slices From Guides' to convert the guides to slices. The converted slices are 'User based slice'.
(See how to create 'User Based Slice' in >> 'Essentials for Slice Select Tool')
(fig 6.0)
You can also create slice based on layers you have in the layer palette, its called 'Layer Based Slice', which you can access from the layer menu.
Next Essential >> 'Essential for Slice Select Tool'
1 comment:
A suitable alternative might be:
http://www.slicephotoshop.com
This online tool will export your PSD file's layers to individual PNGs.
Post a Comment